Kia Sportage: Hood open warning
The hood warning message will appear on the LCD display when hood is open.

The warning chime will operate when the vehicle is being driven at or above 2 mph (3 km/h) with the hood open.
Closing the hood
- Before closing the hood, check the following:
- All filler caps in the engine compartment must be correctly installed.
- Gloves, rags or any other combustible material must be removed f r om the engine compartment
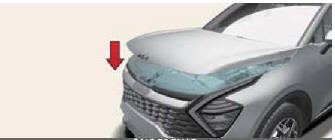
- Lower the hood until it is about 12 in. (30 cm) above the closed position and let it drop. Make sure that it locks into place.
- Check that the hood has engaged properly.
- If the hood can be raise slightly, it is not properly engaged.
- Open it again and close it with a little more force.
Hood obstruction
Before closing the hood, ensure that all obstructions are removed f r om the hood opening. Closing the hood with an obstruction present in the hood opening may result in severe personal injury or property damage.
WARNING
Fire risk
Do not leave gloves, rags or any other combustible material in the motor compartment.
Doing so may cause a heatinduced fire.
WARNING
Unsecured hood
Always double check to be sure that the hood is firmly latched before driving away. If it is not latched, the hood could fly open while the vehicle is being driven, causing a total loss of visibility, which may result in an accident.
READ NEXT:
 Opening the fuel filler door
Fuel filler door
The vehicle's fuel filler door must be
opened and closed by hand from outside
the vehicle.
Opening the fuel filler door
To unlock fuel filler door:
Press the unlock butto
Closing the fuel filler door
To lock fuel filler door:
ress the lock button on your smart
key
Press the Central Door lock button on
armrest trim of driver's door
All doors will automatically lock after
the vehic
SEE MORE:
Securing a child restraint with the
LATCH anchors system
To install a LATCH-compatible child
restraint in either of the rear outboard
seating positions:
Move the seat belt buckle away from
the lower anchors. Otherwise, the
webbing or buckle can be damaged
by the latch anchor, which can make
them become unusable or unsafe.
Move any other ob
Roof panel (Without sunroof)
Roof front rail assembly
Roof rear rail assembly
Roof panel
Roof center No.1 rail
Roof center No.2 rail
Roof center No.3 rail
Roof panel (With sunroof)
Roof front rail assembly
Roof rear rail assembly
Roof panel
Sunroof reinforcement
Roof center No.3 rail
Content
- Home
- Kia Sportage - Fifth generation (NQ5) - (2022-2026) - Owner's Manual
- Kia Sportage - Second generation (JEKM) (2005-2015) - Body Workshop Manual
- Kia Sportage Third generation (SL) - (2011-2016) - Service and Repair Manual
- Sitemap
- Top articles
