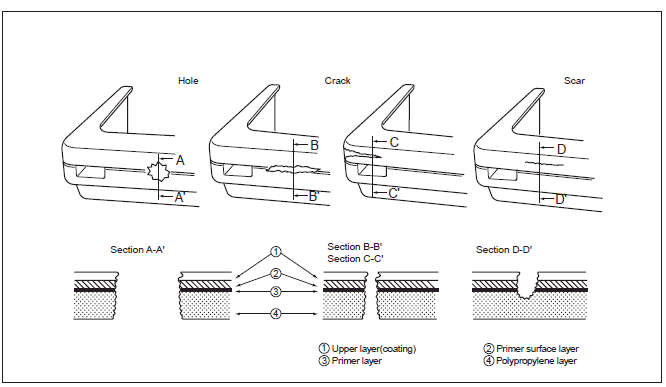
Kia Sportage: Repair method for PP bumper
Damage to the bumper that reaches the surface of the polyporpylene cannot be fixed just by painting. Use the repair methods shown below to repair damage that reaches the surface of the polypropylene.
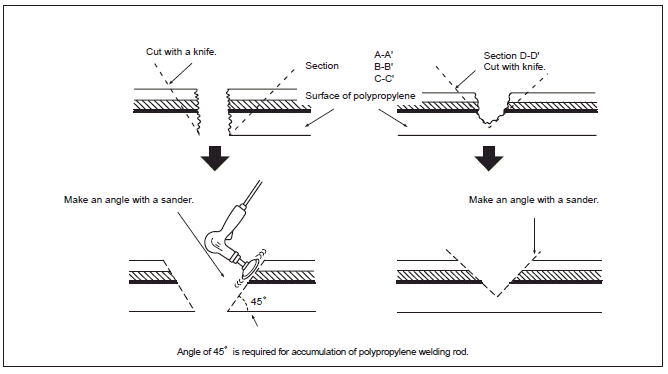
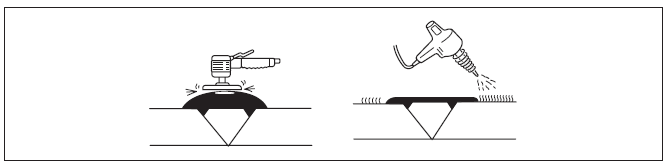
1. Rough cut the damaged area 45º using a knife and then sand the angle smooth.
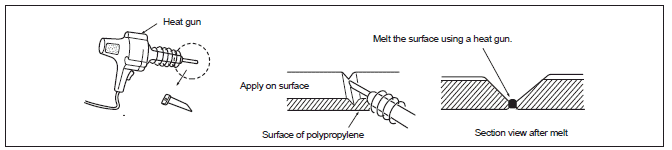
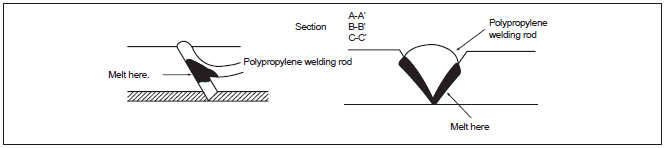
2. Welding damaged area
- To repair cracked area, melt the area using a heat gun and attachment.
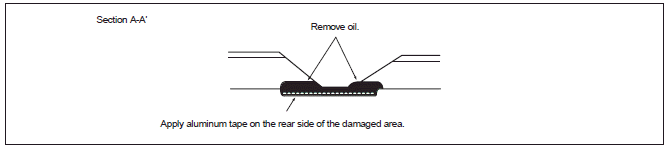
- To repair a hole, remove oil from the damaged area and apply aluminum tape to the rear side of the damaged area.
3. Melt polypropylene welding rod using a heat gun and fill in the cracked area.
Notice
- Heat and melt the area indicated.
- Melt the welding rod carefully so that it does not over-melt. If the welding rod over-melts like jelly, the welding strength will deteriorate.
- Use the heat gun 0.4~0.8 in.(10~20 mm) away from the repair area to be welded.
- Welding rod should not move until the welded area is cooled.

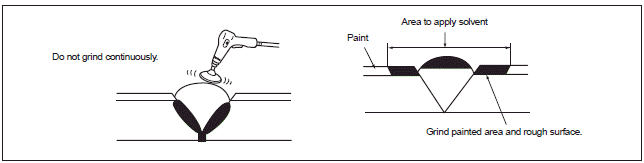
4. Grind polypropylene surface carefully. It melts easily due to the heat generated by friction. If melted, remove that area. Also, grind the area where solvent is to be applied.
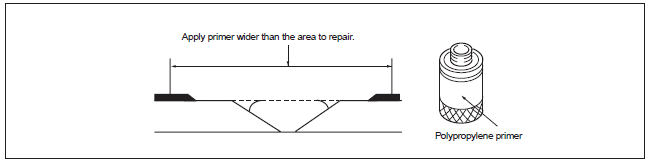
5. Apply polypropylene primer evenly with a brush over an area wider than the area to be repaired.
Dry it at 20ºC (68ºF) for more than 10 minutes.
6. Mix main filler material and hardener at a ratio depending on paint specifications. Mix filler material and apply over the damaged area.
Notice
- Mix main filler material and hardener so that no bubbles are made.
- Work immediately after mixing filler material because the filler material hardens quickly (in about 5 minutes).
- Dry it at 20ºC (68ºF) for about 30 minutes before sanding.
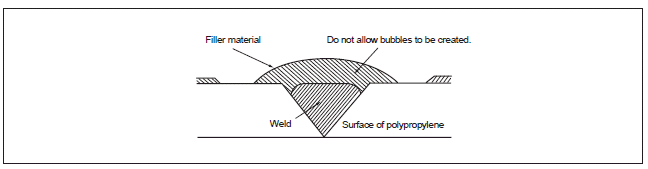
- Filler material consists of two types of epoxy.
When the filler material hardens, you will have a desirable finish with flexibility like polypropylene.
- Use only filler material designed for use on polypropylene bumpers.
7. Sand the damaged area with sandpaper using #180~#240 grit paper.
Notice
- The surface will not be even if excessive force is applied during sanding.
- If there is fuzz in the damaged area, heat it a little bit with a heater gun and melt it.
8. Degrease the painted surface.
9. Mix polypropylene primer and hardener at a ratio depending on paint specifications.
Spray polypropylene primer on the surface of the damaged area and the bumper.

10. Apply polypropylene primer.
Notice
- Use only water to clean after applying polypropylene primer. Solvent, if used, will melt the primer.