Kia Sportage: Rear Seat
Components and Components Location
Components
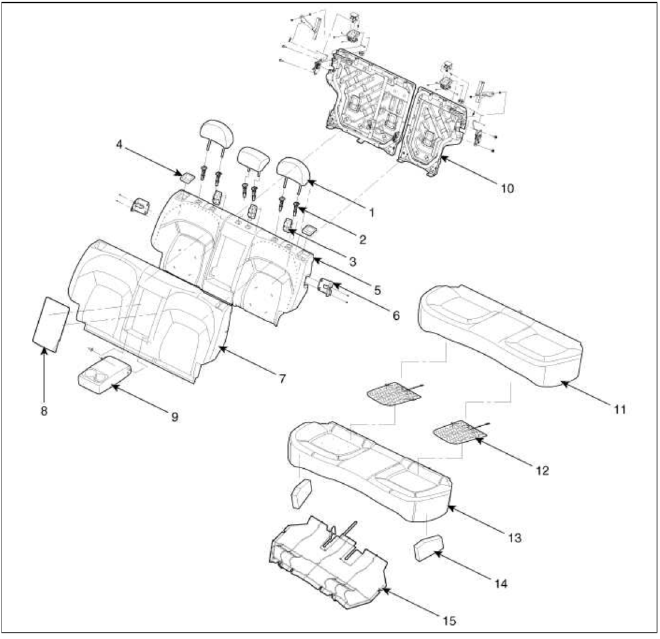
- Headrest
- Headrest guide
- Tether anchor garnish
- Upper bezel
- Rear seat back pad
- Latch cover
- Rear seat back cover
- Armrest board
- Rear armrest
- Rear seat back frame
- Rear seat cushion cover
- Rear seat cushion warmer
- Rear seat cushion pad
- Insert pad rear cushion
- Rear seat cushion frame
Repair procedures
Replacement
Seat Assembly Replacement
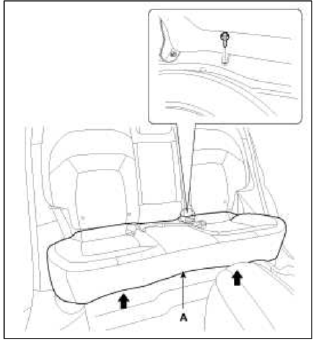
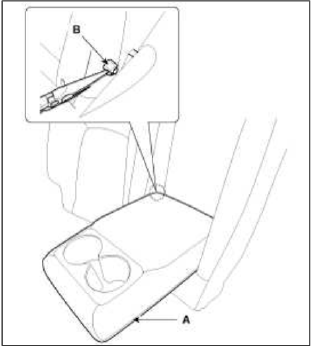
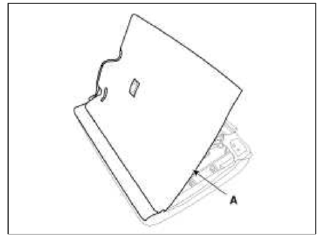
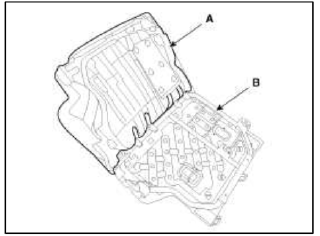
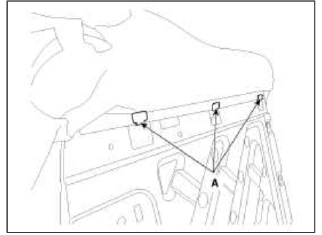
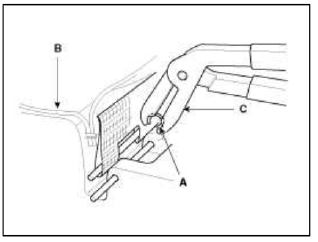
1. After loosening the mounting bolt, then remove the rear seat cushion (A).
Tightening torque: 49.0 ~ 63.7 N.m (5.0 ~ 6.5 kgf.m, 36.2 ~ 47.0 lb-ft)
CAUTION
- Remove the rear cushion to direction of the arrow.
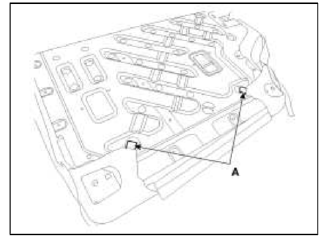
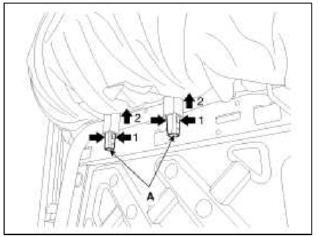
2. Disconnect the rear seat cushion warmer connectors (A).
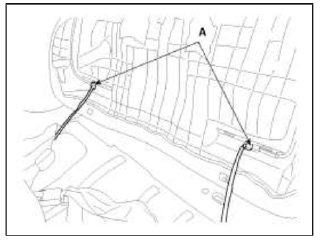
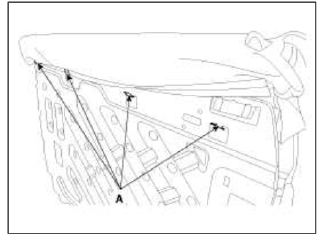
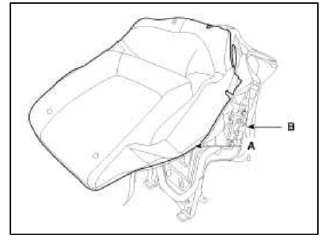
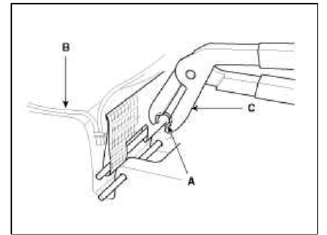
3. After loosening the mounting bolts, then remove the rear seat back (A).
Tightening torque: 49.0 ~ 63.7 N.m (5.0 ~ 6.5 kgf.m, 36.2 ~ 47.0 lb-ft)

4. Installation is the reverse of removal.
NOTE
- Make sure the connector is connected properly.
Seat Back Cover Replacement [RH]
CAUTION
- When prying with a flat-tip screwdriver, wrap it with protective tape, and apply protective tape around the related parts, to prevent damaged.
- Put on gloves to protect уоur hands.
1. Remove the rear seat assembly.
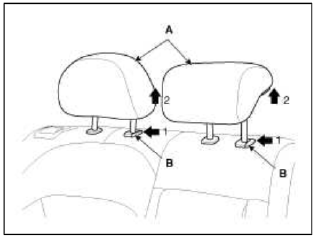
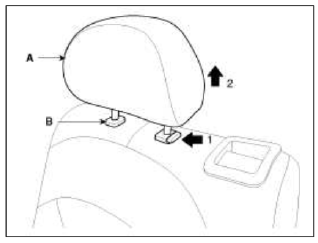
2. Push the lock pin (B) and then remove the headrest (A).
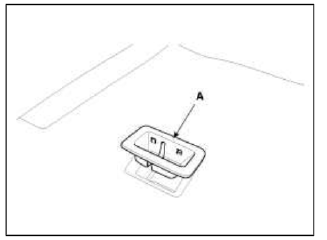
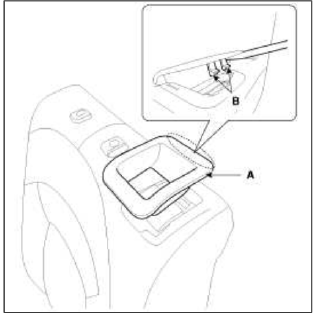
3. Push the hook (B) and then remove the upper bezel (A).
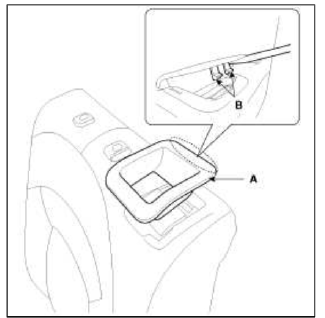
4. Using a screwdriver or remover, remove the tether anchor garnish (A).
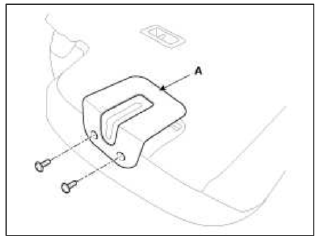
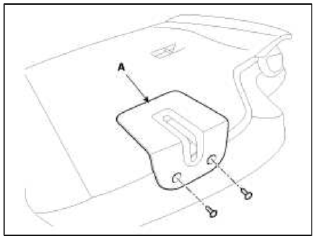
5. After loosening the mounting screws, then remove the latch cover (A).
6. Using a long nose, remove the rock pin (B) and armrest (A).
7. Zip off the seat back cover (A), and then full it up.
8. Disconnect the protector (A).
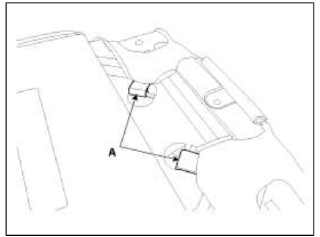
9. Disconnect the hooks (A).
10. Pull out the headiest guides (A) while pinching the end of the guides, and remove them.
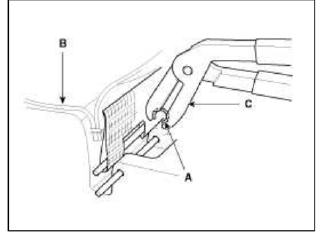
11. Remove the seat back cover (A) from the seat back frame (B).
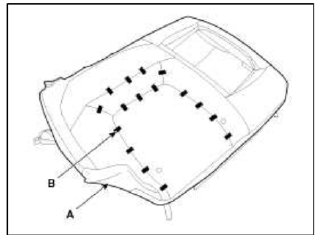
12. After removing the hog ring clips (B) on the rear of seat back, remove the seat back cover (A).
13. Installation is the reverse of removal.
NOTE
- To prevent wrinkles, make sure the material is sketched evenly over the cover (B) before seeming the hog ring clips (A).
- Replace the hog ring clips with new ones using special tool [C (09880-4F000) ].
Rear Seat Latch Replacement
1. Remove the seat back cover.
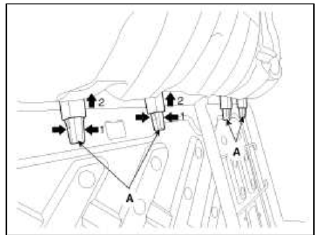
2. After loosening the mounting bolts and then disconnecting the rod (B).
3. Remove the rear seat latch (A).
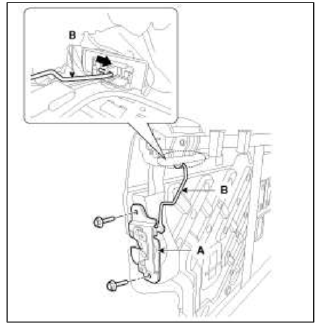
4. Installation is the reverse of removal.
Seat Back Cover Replacement [LH]
CAUTION
- When prying with a flat-tip screwdriver, wrap it with protective tape, and apply protective tape around the related pails, to prevent damaged.
- Put on gloves to protect your hands.
1. Remove the rear seat assembly.
2. Push the lock pin (B) and then remove the headiest (A).
3. Push the hook (B) and then remove the upper bezel (A).
4. Using a screwdriver or remover, remove the tether anchor garnish (A).

5. After loosening the mounting screws, then remove the latch cover (A).
6. Zip off the seat back cover (A), and then full it up.

7. Disconnect the protector (A).
8. Disconnect the hooks (A).
9. Pull out the headrest guides (A) while pinching the end of the guides, and remove them.
10. Remove the seat back cover (A) from the seat back frame (B).
11. After removing the hog ring clips (B) on the rear of seat back, remove the seat back cover (A).
12. Installation is the reverse of removal.
NOTE
- To prevent wrinkles, make sure the material is stretched evenly over the cover (B) before seeming the hog ring clips (A).
- Replace the hog ring clips with new ones using special tool [C (09880-4F000) ].
Rear Seat Cushion Cover Replacement
CAUTION
- When prying with a flat-tip screwdriver, wrap it with protective tape, and apply protective tape around the related pails, to prevent damaged.
- Put on gloves to protect your hands.
1. Remove the rear seat cushion.
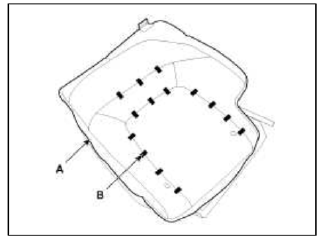
2. Remove the hog ring clips (A).
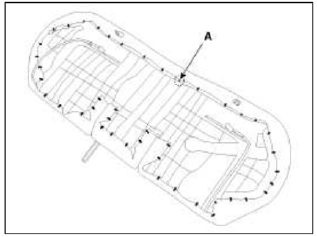
3. After removing the hog ring clips (B) on the rear of seat cushion, remove the seat cushion cover (A).
4. Installation is the reverse of removal.
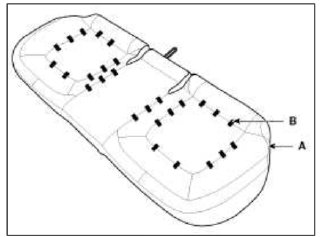
NOTE
- To prevent wrinkles, make sure the material is stretched evenly over the cover (B) before securing the hog ring clips (A).
- Replace the hog ring clips with new ones using special tool [C (09880-4F000) ].
READ NEXT:
 Components and Components Location | Front Seat Belt
Components
Front seat belt
Height adjuster
Rear seat belt
Rear seat belt [Center]
Rear seat belt buckle
Front Seat Belt
Repair procedures
Replacement
Fr
SEE MORE:
Direct Electro Hydraulic Actuator Coupling
Description and Operation
Description
4WD ECU processes signals from various sensors and determines the current
road and driving conditions. The ECU then
utilizes this information to implement precision control over the 4WD coupling's
multi-plate clutch and variably adjust the
amou
Description and Operation | Catalytic Converter | CVVT (Continuously Variable Valve Timing) System
Description
Exhaust emissions (CO, HC, NOx) are controlled by a combination of engine modifications and the addition of special control components.
Modifications to the combustion chamber, intake manifold, camshaft and ignition system form the basic control system.
These items have been i
Content
- Home
- Kia Sportage - Fifth generation (NQ5) - (2022-2026) - Owner's Manual
- Kia Sportage - Second generation (JEKM) (2005-2015) - Body Workshop Manual
- Kia Sportage Third generation (SL) - (2011-2016) - Service and Repair Manual
- Sitemap
- Top articles
