Kia Sportage: Rear Upper Arm | Rear Lower Arm
Repair procedures
Replacement
1. Remove the rear wheel & tire.
Tightening torque: 88.3 ~ 107.9N.m (9.0 ~ 11.0kgf.m, 65.1 ~ 79.6lb-ft)
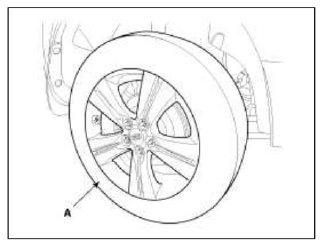
CAUTION
Be careful not to damage to the hub bolts when removing the front wheel & tire (A).
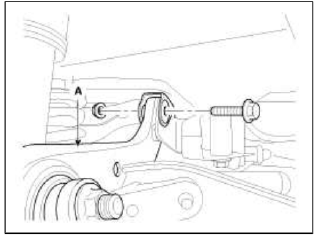
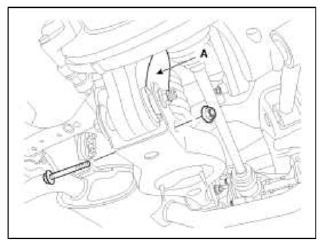
2. Loosen the bolt & nut and then remove the rear upper arm (A) with the rear axle.
Tightening torque:
2WD
137.3 ~ 156.9N.m (14.0 ~ 16.0kgf.m, 101.3 ~ 115.7lb-ft)
4WD
98.1 ~ 117.7N.m (10.0 ~ 12.0kgf.m, 72.3 ~ 86.8lb-ft
[2WD]
![[4WD]](images/books/1921/25/index%2038.png)
[4WD]
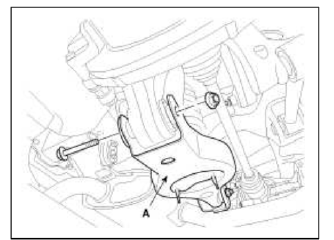
3. Loosen the bolt & nut and then remove the rear upper arm (A) with the sub frame.
Tightening torque:
2WD
137.3 ~ 156.9N.m (14.0 ~ 16.0kgf.m, 101.3 ~ 115.7lb-ft)
4WD
98.1 ~ 117.7N.m (10.0 ~ 12.0kgf.m, 72.3 ~ 86.8lb-ft)
[2WD]
![[4WD]](images/books/1921/25/index%2040.png)
[4WD]

4. Installation is the reverse of removal.
CAUTION
Install the rear upper arm so that the letter 'R' can face the rear of vehicle.
Inspection
1. Check the bushing for wear and deterioration.
2. Check the rear upper arm or damage and deformation.
3. Check for all bolts and nut.
Rear Lower Arm
Repair procedures
Replacement
1. Remove the rear wheel & tire.
Tightening torque: 88.3 ~ 107.9N.m (9.0 ~ 11.0kgf.m, 65.1 ~ 79.6lb-ft)
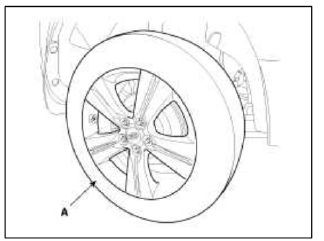
CAUTION
Be careful not to damage to the hub bolts when removing the front wheel & tire (A).
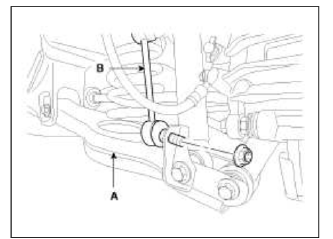
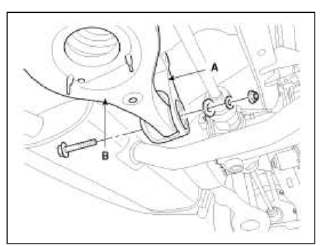
2. Loosen the nut and then remove the rear stabilizer link (B) with the rear lower arm (A).
Tightening torque: 98. 1 ~ 117.7N.m (10.0 ~ 12.0kgf.m 72.3 ~ 86.8lb-ft
3. Loosen the bolt & nut and then remove the rear shock absorber (A) with the lower arm.
Tightening torque: 137.3 ~ 156.9N.m (14.0 ~ 16.0kgf.m, 101.3 ~ 115.7lb-ft)
4. Loosen the bolt & nut and then remove the rear lower arm (A) with the rear axle.
Tightening torque: 137.3 ~ 156.9N.m (14.0 ~ 16.0kgf.m. 101.3 ~ 115.7lb-ft)
5. Loosen the bolt & nut and then remove the rear lower arm (B) with the sub frame (A).
Tightening torque: 137.3 ~ 156.9N.m (14.0 ~ 16.0kgf.m. 101.3 ~ 115.7lb-ft)
6. Installation is the reverse of removal.
Inspection
1. Check the bushing for wear and deterioration.
2. Check the rear lower arm for deformation.
3. Check the coil spring and spring pad for deterioration and deformation.
4. Check for all bolts and nut.
READ NEXT:
 Rear Stabilizer Bar | Rear Assist Arm
Repair procedures
Replacement
1. Remove the rear wheel & tire.
Tightening torque: 88.3 ~ 107.9N.m (9.0 ~ 11.0kgf.m, 65.1 ~ 79.6lb-ft)
CAUTION
Be careful not to damage to the hub bolts
SEE MORE:
Warning messages
The Auto Hold function will display a
warning message with sound under certain
conditions.
When the EPB is applied from Auto Hold,
a warning will sound and a message will
appear.
Parking brake automatically
engaged
When the conversion from Auto Hold to
EPB is not working properly
Polypropylene (PP) bumper repairability
The three types of damaged bumpers shown below can
be repaired. Because of cost and quality
considerations, bumpers with more damage may be
repaired, but replacing the bumper is encouraged.
1. If a hole on a bumper is less than 2 in.(50 mm).
2. If a crack on a bumper is less than 4 in.(100 mm
Content
- Home
- Kia Sportage - Fifth generation (NQ5) - (2022-2026) - Owner's Manual
- Kia Sportage - Second generation (JEKM) (2005-2015) - Body Workshop Manual
- Kia Sportage Third generation (SL) - (2011-2016) - Service and Repair Manual
- Sitemap
- Top articles
