Kia Sportage: Assembly - Replacing body panel
Assembly
1. Checking welding and fitting in advance
- When assembling a new part, measure the dimensions of each part according to the body dimensions given in Section 31, and set part to the reference dimensions.
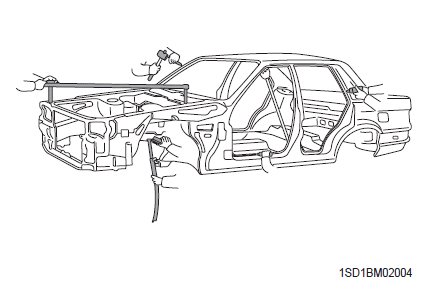
- Prior to final welding, check the fit of all related parts.
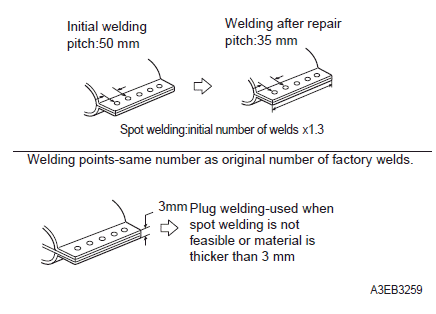
2. Selecting number of welding points
Spot welding : Multiply the original number of factory welds by 1.3 times
Plug welding : Same number as original number of factory welds
Notice
- Plug welding should be done using a carbon arc welding machine.
- Brazing should be done only on areas that were originally brazed at the factory.
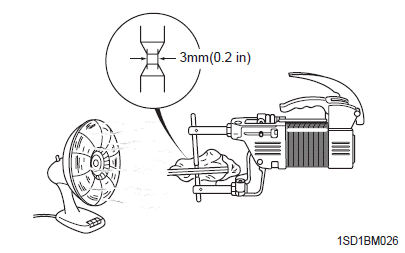
3. Caution when spot welding
- Do a test welding on a piece of material of the same type and thickness as the part to be welded and proceed if test weld is good.
- Before spot welding, check if welding debris, oil or
paint is present on the area where surfaces meet.
Clean or sand as necessary.
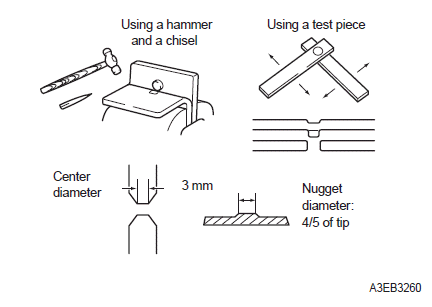
- The tip of the spot welding machine should be maintained to a minimum tolerance of 3 mm. Also let area cool after 5 or 6 welds to minimize problems caused by excessive heat.
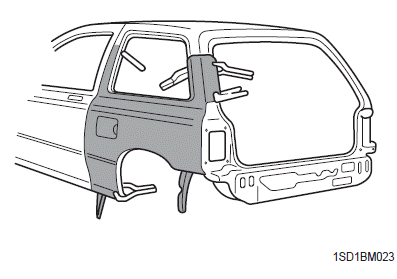
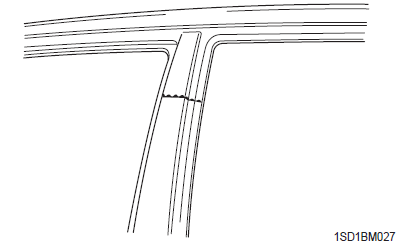
4. Cutting and welding an assembled area
To align a roof panel and a center pillar together for butt welding, temporarily fasten a steel flange to the roof panel and then apply the new center pillar panel.
Remove the flange when final welding is done.
5. Finishing after welding
- Grind any areas that were plug welded or butt welded using a disk grinder. Grind carefully to avoid removing too much material. This degrades the strength of the weld.
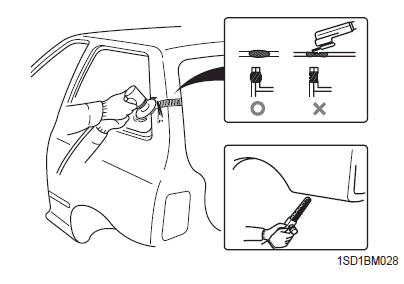
- Finish areas that have been brazed by applying body filler then smooth the area with a flexible file and sander.
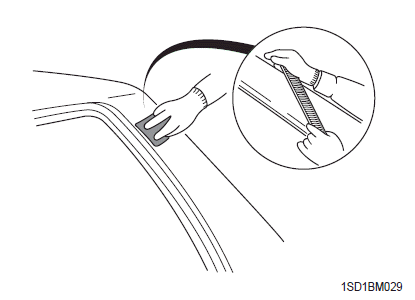
6. Applying anti-rust agent and body sealer
After coating the surface with anti-rust agent, apply body sealer where necessary.
Notice
- Apply body sealer before assembly.
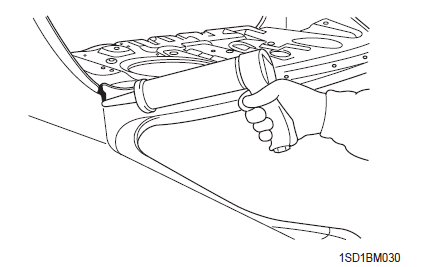
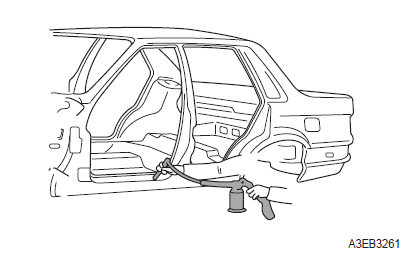
7. Anti-rust treatment
Apply anti-rust agent to inside of doors and sills by spraying through access holes provided.
READ NEXT:
 Fender apron panel assembly
Welding part
Setion
Cowl panel assembly
Welding part
Section
Dash panel assembly
Welding part
Section
Center floor panel assembly
Welding part
Section
Re
Body dimensions
Body dimension indications
Projected dimensions
The projected dimension indicates a dimension from a reference point on the
body. (Height may be different in some
cases).
Straight-line dimension
Waterproof and rustproof
Sealing
To waterproof and rustproof the vehicle, apply sealer on assembled area of
the body panel and on any areas in
contact with the body, such as doors (inner/outer), hood (inner/outer), and ta
SEE MORE:
General Information
Specifications
Specifications
Ignition System
Starting System
Charging System
CAUTION
COLD CRANKING AMPERAGE is the amperage a battery can deliver for 30
seconds and maintain a
terminal voltage of 7.2V or greater at a specified temperature.
RESERVE CAPACITY RATING is amou
Driver's seat belt warning
As a reminder to the driver, the driver's
seat belt warning lights will appear for
approximately 6 seconds each time you
turn the ENGINE START/STOP button
ON regardless of belt fastening. If the
seatbelt is not fastened, the warning
chime will sound for about 6 seconds.
If you start
to
Content
- Home
- Kia Sportage - Fifth generation (NQ5) - (2022-2026) - Owner's Manual
- Kia Sportage - Second generation (JEKM) (2005-2015) - Body Workshop Manual
- Kia Sportage Third generation (SL) - (2011-2016) - Service and Repair Manual
- Sitemap
- Top articles
