Kia Sportage: Front Seat
Components and Components Location
Components
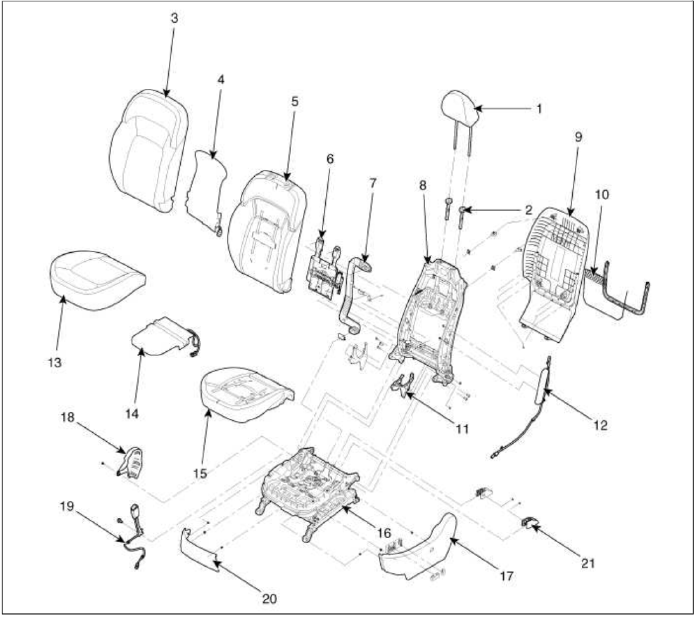
- Headrest
- Headrest guide
- Front seat back cover
- Front seat back heater
- Front seat back pad
- Front seat back power lumbar
- Front seat back duct
- Front seat back frame
- Front seat back cover
- Front seat map pocket
- Front inside cover
- Front airbag module
- Front seat cushion cover
- Front seat cushion heater
- Front seat cushion pad
- Front seat cushion frame
- Front shield outer cover
- Front shield inner cover
- Front seat buckle
- Front shield cover
- Front foot cover
Repair procedures
Replacement
Seat Assembly Replacement
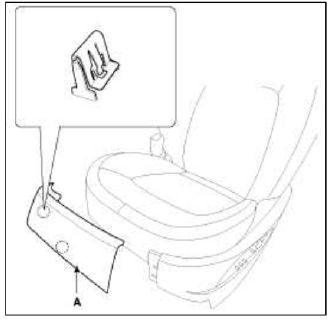
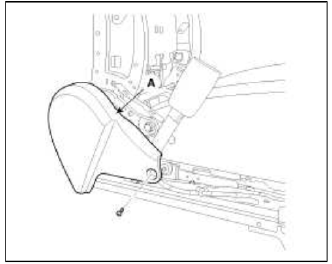
1. Remove the front foot cover.
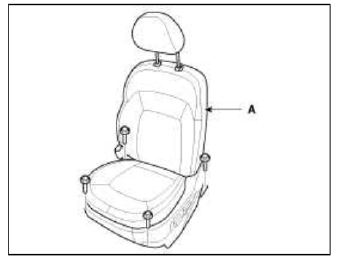
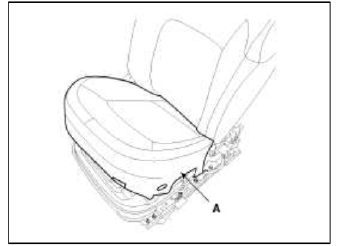
2. After loosening the front seat assembly mounting bolts, remove the front seat assembly (A).
Tightening torque: 49.0 ~ 63.7 N.m (5.0 ~ 6.5 kgf.m, 36.2 ~ 47.0 lb-ft)
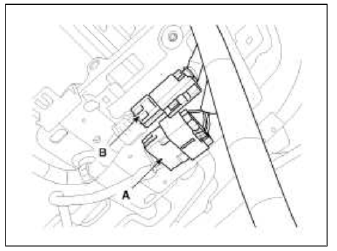
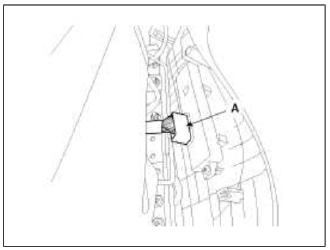
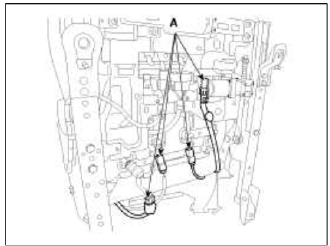
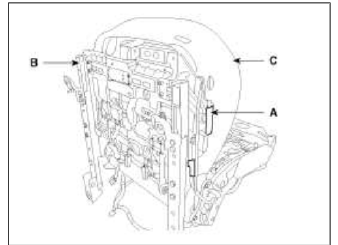
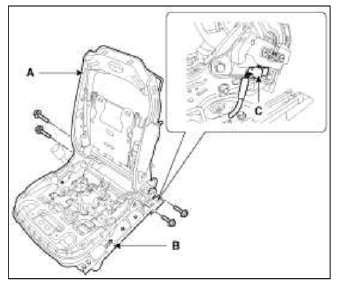
3. Disconnect the power seat connectors (A), airbag connector (B).
[Driver's]
![[Passenger's]](images/books/1921/6/index%2015.png)
[Passenger's]
4. Installation is the reverse of removal.
CAUTION
Seat Mounting Bolt Installation Procedure
- Set the into the most rearward position. Check then each slide is locked, and then Tighten the front mounting bolt temporarily.
- Set the seat into most forward position. Check that each slide is locked, and then Tighten the rear mounting bolt completely.
- Set the seat into the most rearward position. Check the front mounting bolt completely.
- Check that the seat operates back and forth smoothy and the locking portion locks properly.
Front Shield Outer Cover Replacement
CAUTION
- When prying with a flat-tip screwdriver, wrap it with protective tape, and apply protective tape around the related parts your hands.
- Put on gloves to protect your hands.
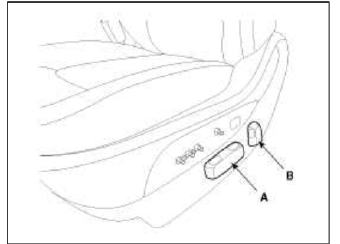
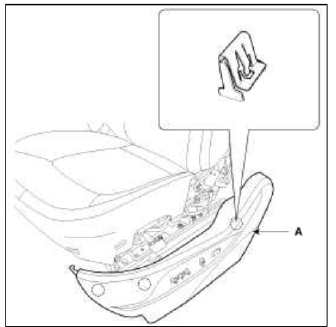
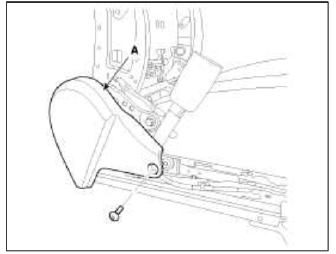
1. Remove the recliner switch (A) and height switch (B).
2. Using a screwdriver or remover, remove the front shield cover (A).
3. Using a screwdriver or remover, remove the front shield outer cover (A).
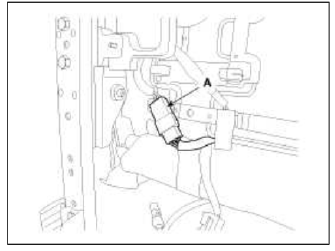
4. Disconnect the connector (A).
5. Installation is the reverse of removal.
NOTE
- Make sure the connectors are plugged in properly.
- Replace any damage clips.
- Be sure to perform PODS re-zero with the GDS after replacing parts
(passenger's)
(Refer to page RT -"Airbag")
Seat Back Cover Replacement
CAUTION
- When prying with a flat-tip screwdriver, wrap it with protective tape, and apply protective tape around the related parts your hands.
- Put on gloves to protect your hands.
1. Remove front seat assembly.
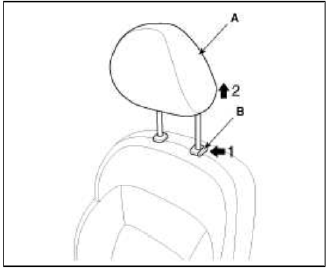
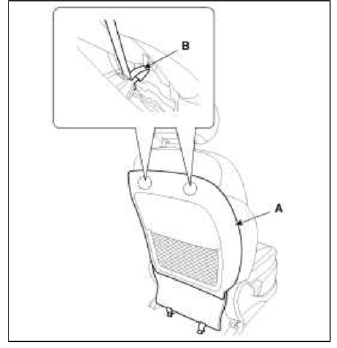
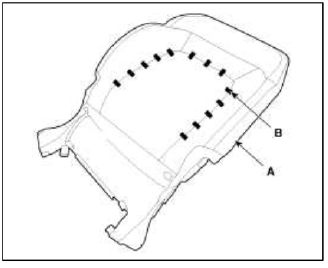
2. Push the lock pin (B), remove the headrest (A).
3. Disconnect the connectors (A).
4. Push the clips (B), from the front seat back cover (A).
CAUTION
- Push the middle area of clip using the flat head screwdriver.
- Be careful not to damage the clips.
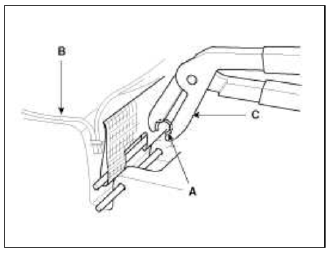
5. Push the porotecter (A) by the seat back frame.
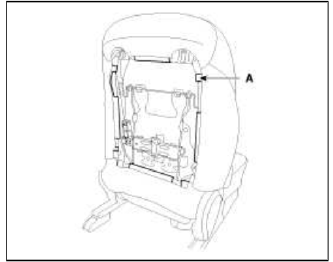
6. Pull out the headrest guides (A) while pinching the end of the guides, and remove them.

7. Remove the seat back cover (A) from the frame.
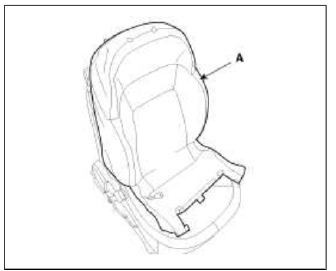
8. After removing the hog ring clips (B) on the front of seat back and remove the seat back cover (A).
9. Installation is the reverse of removal.
NOTE
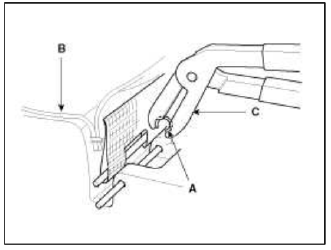
- To prevent wrinkles, make sure the material is stretched evenly over the cover (B) before securing the hog ring clips (A).
- Replace the hog ring clips with new ones using special tool (C) (09880-4F000).
NOTE
- Be sure to perform PODS re-zero with the GDS after replacing parts
(Passenger's)
(Refer to page RT - "Airbag")
Seat Cushion Cover Replacement
1. Remove front seat assembly.
2. Remove the front shield outer cover.
3. After loosening the mounting screw, then remove the front shield inner cover (A).
4. Disconnect the connector (A).
5. Push the protecter (A) and then seat cushion cover (C) from the frame (B).
6. Remove the seat cushion cover (A) from the frame.
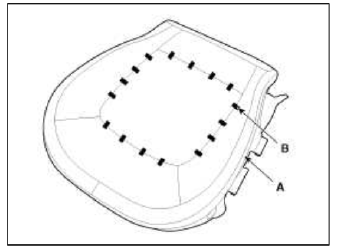
7. After removing the hog ring clips (B) on the front of seat cushion and remove the seat cushion cover (A).
8. Installation is the reverse of removal.
NOTE
- To prevent wrinkles, make sure the material is stretched evenly over the cover (B) before securing the hog ring clips (A).
- Replace the hog ring clips with new ones using special tool (C) (09880-4F000).
NOTE
- Be sure to perform PODS re-zero with the GDS after replacing parts
(Passenger's)
(Refer to page RT - "Airbag")
Seat Frame Replacement
1. Remove the following items.
- Front seat
- Seat back cover
- Seat cushion cover
2. After loosening the mounting screw, then remove the front shield inner cover (A).
3. Disconnect the connector (C).
4. After loosening the mounting bolts, then disconnect the seat back frame (A) and seat cushion frame (B).
NOTE
- Remove the side airbag for replacing side airbag installation seat.
- Before service, be fully aware of precautions and service procedure
relevant to airbag.
(Refer to the RT group - "Airbag")
Tightening torque: 49.0 ~ 63.7 N.m (5.0 ~ 6.5 kgf.m, 36.2 ~ 47.0 lb-ft)
5. Installation is the reverse of removal
NOTE
- Be sure to perform PODS re-zero with the GDS after replacing parts
(Passenger's)
(Refer to page RT - "Airbag")
READ NEXT:
 Rear Seat
Components and Components
Location
Components
Headrest
Headrest guide
Tether anchor garnish
Upper bezel
Rear seat back pad
Latch cover
Rear seat back cover
Armrest board
Components and Components Location | Front Seat Belt
Components
Front seat belt
Height adjuster
Rear seat belt
Rear seat belt [Center]
Rear seat belt buckle
Front Seat Belt
Repair procedures
Replacement
Fr
SEE MORE:
Speakers
Repair procedures
Inspection
1. Troubleshooting for Speaker
Basic inspection of speaker
Inspect the sound from speaker after verifying that the speaker mounting
screws are removed and the wiring
connector is connected to remove any possible vibration transmitted from body
trim
Roof panel (Without sunroof)
Roof front rail assembly
Roof rear rail assembly
Roof panel
Roof center No.1 rail
Roof center No.2 rail
Roof center No.3 rail
Roof panel (With sunroof)
Roof front rail assembly
Roof rear rail assembly
Roof panel
Sunroof reinforcement
Roof center No.3 rail
Content
- Home
- Kia Sportage - Fifth generation (NQ5) - (2022-2026) - Owner's Manual
- Kia Sportage - Second generation (JEKM) (2005-2015) - Body Workshop Manual
- Kia Sportage Third generation (SL) - (2011-2016) - Service and Repair Manual
- Sitemap
- Top articles
