Kia Sportage: General Information
Specifications
Specifications
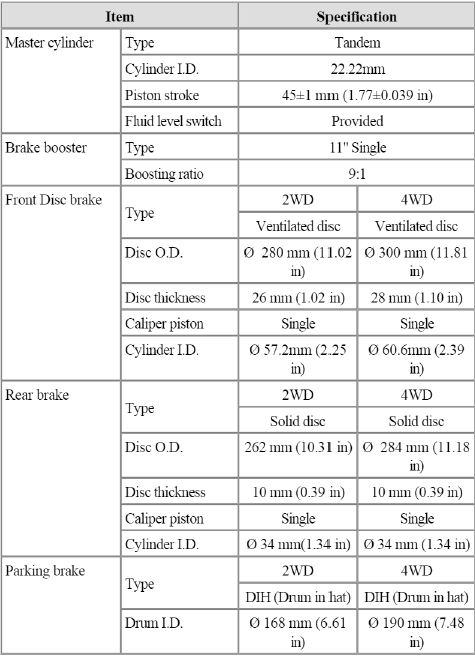
NOTE
O.D. : Outer Diameter
I.D. : Inner Diameter
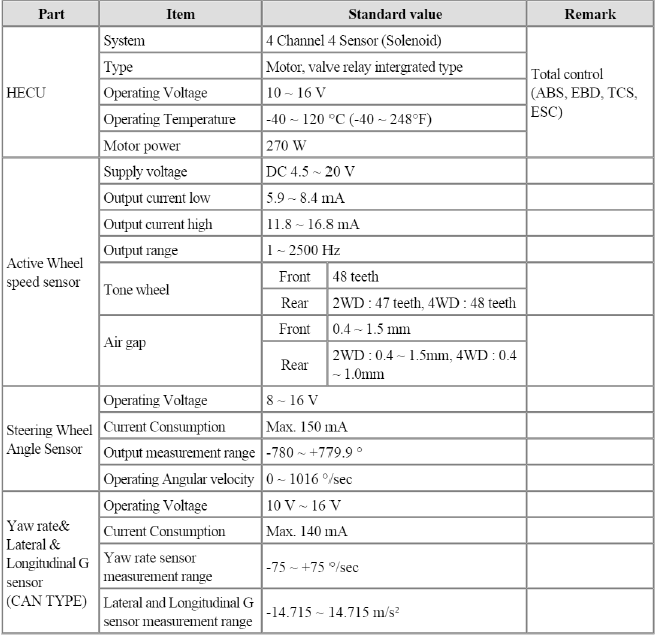
Specification (ESC)
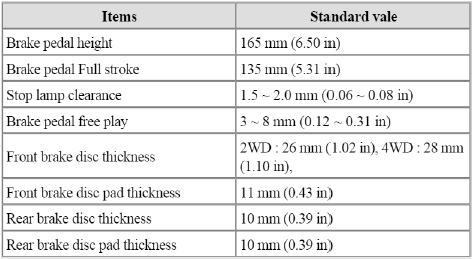
Service Standard
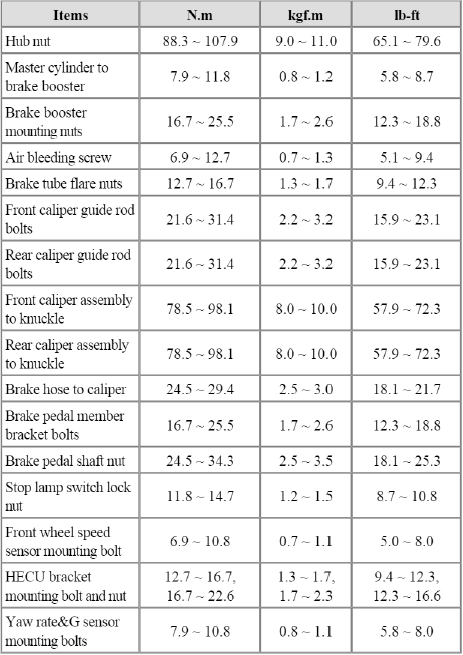
Tightening Torques
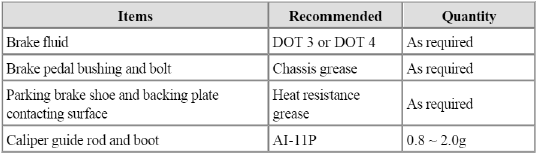
Lubricants
Special Service Tools
Special Service Tools

Troubleshooting
Troubleshooting
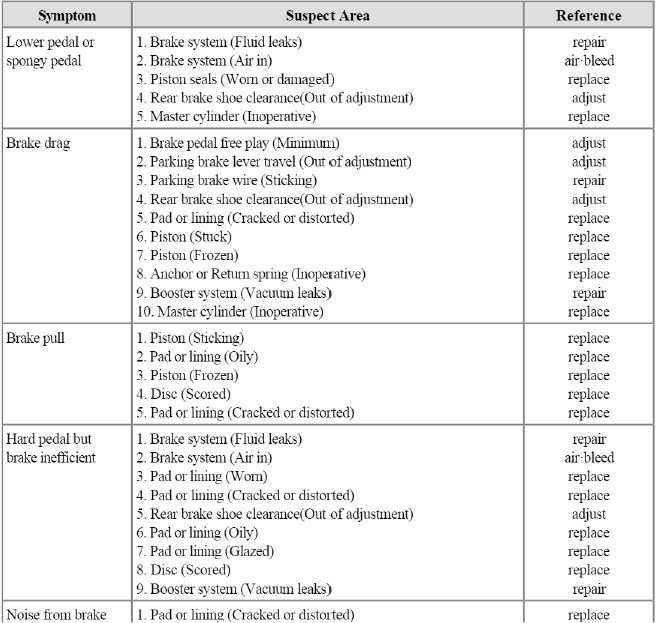
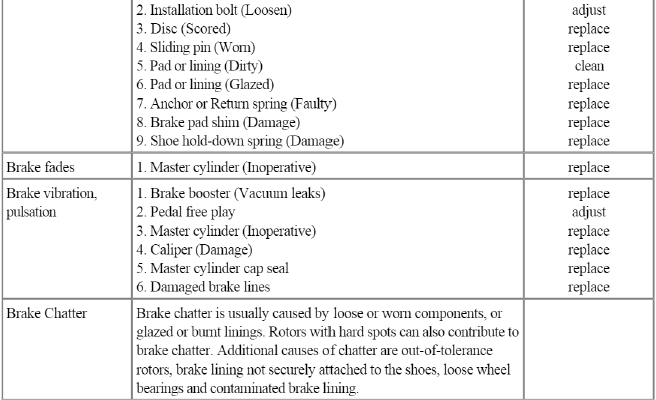
Problem Symptoms Table
Use the table below to help you find the cause of the problem. The numbers indicate the priority of the like cause of the problem. Check each part in order.
If necessary, replace these parts.
Brake System
Repair procedures
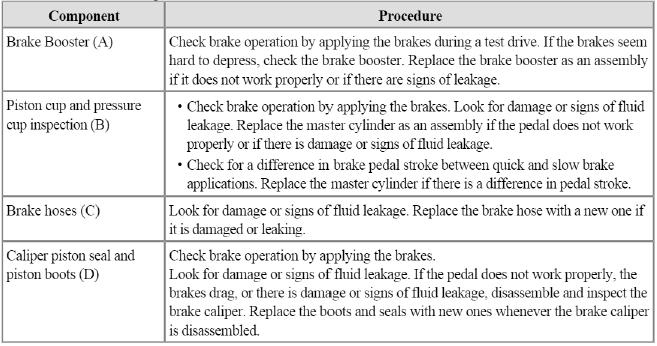
Operation and Leakage Check
Check all of the following items:
Brake System Bleeding
CAUTION
- Do not reuse the drained fluid.
- Always use genuine DOT3 DOT4 brake Fluid.
Using a non-genuine DOTS DOT4 brake fluid can cause corrosion and decrease the life of the system.
- Make sure no dirt or other foreign matter is allowed to contaminate the brake fluid.
- Do not spill brake fluid on the vehicle, it may damage the paint; if brake fluid does contact the paint, wash it off immediately with water.
- The reservoir on the master cylinder must be at the MAX (upper) level mark at the start of bleeding procedure and checked after bleeding each brake caliper. Add fluid as required.
1. Make sure the brake fluid in the reservoir is at the MAX(upper) level line.
2. Have someone slowly pump the brake pedal several times, and then apply pressure.
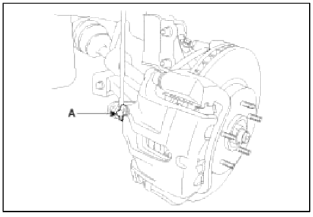
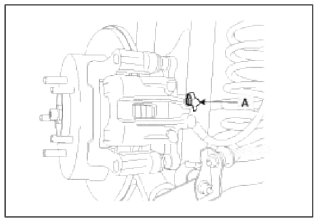
3. Loosen the right-rear brake bleed screw (A) to allow air to escape from the system. Then tighten the bleed screw securely.
Front
Rear
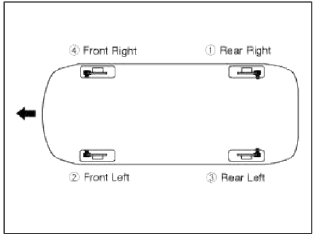
4. Repeat the procedure for wheel in the sequence shown below until air bubbles no longer appear in the fluid.
5. Refill the master cylinder reservoir to MAX (upper) level line.
READ NEXT:
 Components and Components Location | Repair procedures
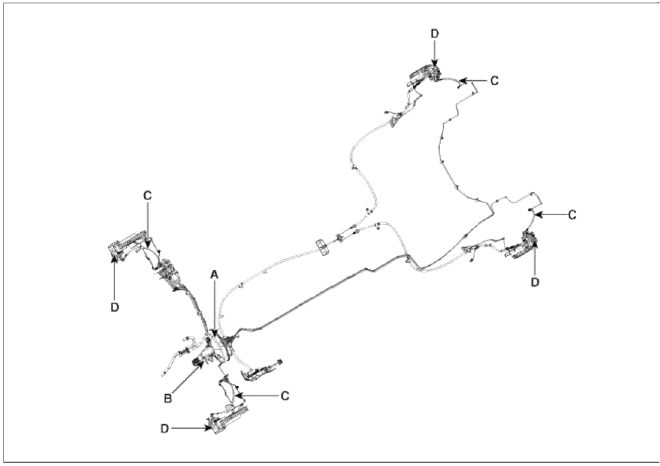
Components (1)
Brake booster
Master cylinder assembly
O-ring
Components (2)
[2.0T - GDI ENGINE ONLY]
Vacuum pump
Bracket
Repair procedures
SEE MORE:
Climate control air filter
The climate control air filter installed
behind the glove box filters the dust or
other pollutants that come into the vehicle
from the outside through the heating
and air conditioning system.
Outside air
Recirculated air
Climate control air filter
Blower
Evaporator core
Heater
General Information | Front Body
General
1. Basically, all measurements in this manual are taken with a tracking gauge.
2. When a measuring tape is used, check to be sure there is no elongation, twisting or bending.
3. For measuring dimensions, both projected dimension and actual-measurement dimension are used in this m
Content
- Home
- Kia Sportage - Fifth generation (NQ5) - (2022-2026) - Owner's Manual
- Kia Sportage - Second generation (JEKM) (2005-2015) - Body Workshop Manual
- Kia Sportage Third generation (SL) - (2011-2016) - Service and Repair Manual
- Sitemap
- Top articles
