Kia Sportage: Interior Trim
Components and Components Location
Components
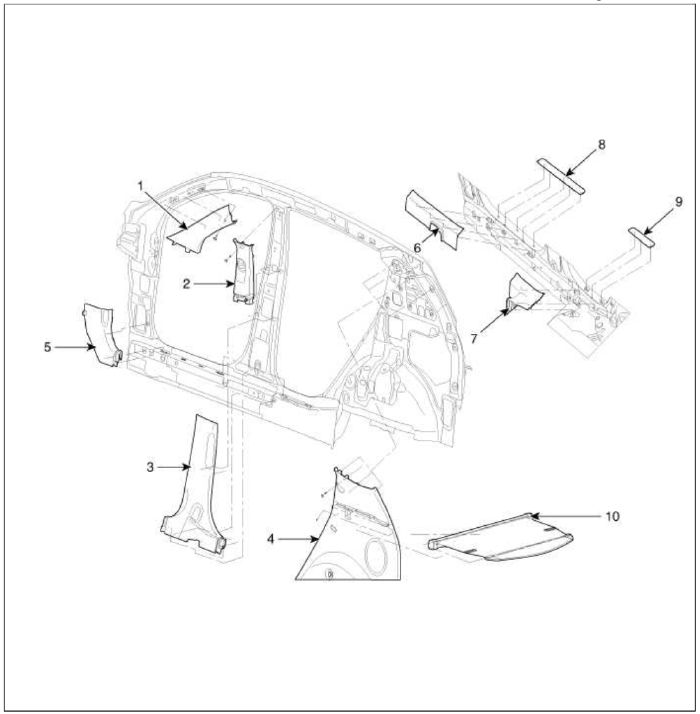
- Front pillar trim
- Center pillar upper trim
- Center pillar lower trim
- Luggage side trim
- Cowl side trim
- Front door scuff trim
- Rear door scuff trim
- Front step trim
- Rear step trim
- Cargo screen
Repair procedures
Replacement
Door Scuff Trim Replacement
CAUTION
- Put on gloves to protect your hands.
- Use a plastic panel removal tool to remove interior trip pieces to without marring the surface.
- Take care not to bend or scratch the trim and panels.
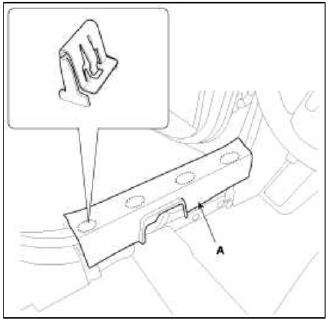
1. Using a screwdriver or remover, remove the front door scuff trim (A).
[Front]
2. Remove the rear seat.
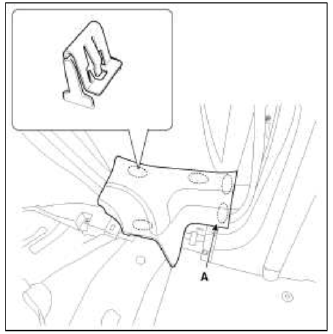
3. Using a screwdriver or remover, remove the rear door scuff trim (A).
[Rear]
4. Installation is the reverse of removal.
NOTE
- Replace any damage clips.
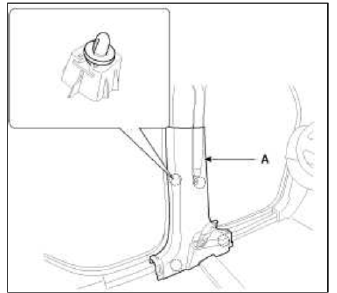
Front Pillar Trim Replacement
CAUTION
- Put on gloves to protect your hands.
- Use a plastic panel removal tool to remove interior hip pieces to without marring the surface.
- Take care not to bend or scratch the trim and panels.
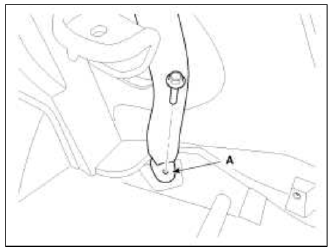
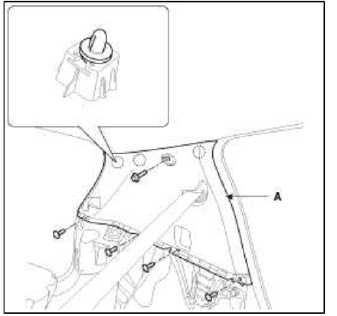
1. After loosening the mounting bolt, then remove the front pillar trim (A).
2. Installation is the reverse of removal.
NOTE
- Replace any damage clips.
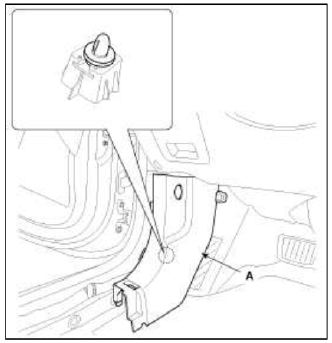
Cowl Side Trim Replacement
CAUTION
- Put on gloves to protect your hands.
- Use a plastic panel removal tool to remove interior trip pieces to without marring the surface.
- Take care not to bend or scratch the trim and panels
1. Remove the front door scuff trim.
2. Remove the hood release handle.
(Refer to the BD group - "Hood")
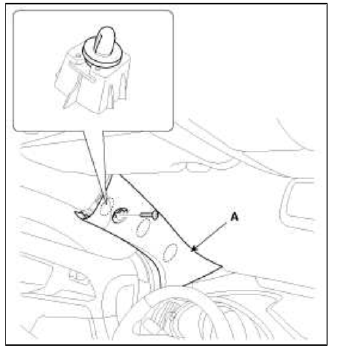
3. Using a screwdriver or remover, remove the cowl side trim (A).
4. Installation is the reverse of removal.
NOTE
- Replace any damage clips.
Center Pillar Trim Replacement
CAUTION
- Put on gloves to protect your hands.
- Use a plastic panel removal tool to remove interior trip pieces to without marring the surface.
- Take care not to bend or scratch the trim and panels.
1. Remove the front door scuff trim and rear door scuff trim.
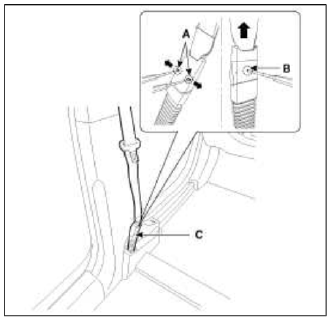
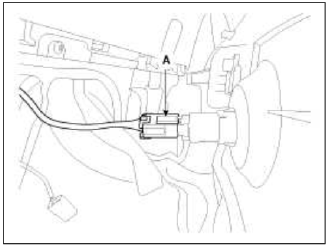
2. To remove the seat belt anchor pretensioner (C), keep on pushing the lock pins (A) as arrow direction.
And then remove the seat belt after pushing the lock pin (B).
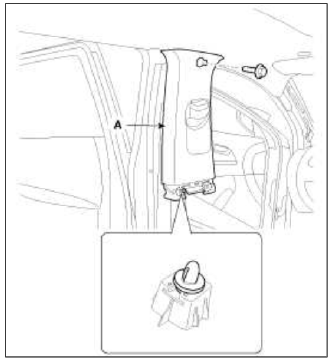
3. Using a screwdriver or remover, remove the center pillar lower trim (A).
4. After loosening the mounting bolt, then remove the center pillar upper trim (A).
5. Installation is the reverse of removal.
NOTE
- Replace any damage clips.
Rear Pillar Trim Replacement
CAUTION
- Put on gloves to protect your hands.
- Use a plastic panel removal tool to remove interior trip pieces to without marring the surface.
- Take care not to bend or scratch the trim and panels.
1. Remove the rear seat.
(Refer to the BD group - "Rear Seat")
2. Remove the rear door scuff trim.
3. Detach the mounting clips, remove the transverse trim (A).
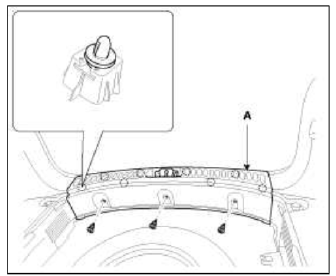
4. After loosening the mounting bolt, then remove the rear seat belt lower anchor (A).
Tightening torque: 39.2 ~ 53.9 N.m (4.0 ~ 5.5 kgf.m, 28.9 ~ 39.8 lb-ft)
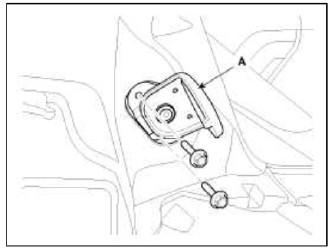
5. After loosening the mounting bolts, then remove the rear seat bracket (A).
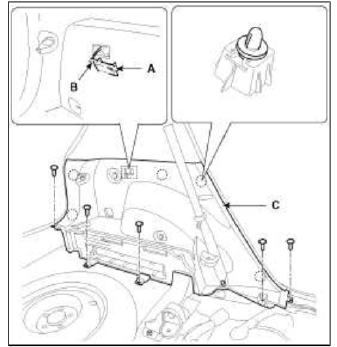
6. Using a screwdriver or remover, remove the lamp (A).
7. Disconnect the connector (B).
8. After loosening the mounting screws, then remove the luggage side trim (C).
9. Disconnect the connector (A).
10. After loosening the mounting screws and bolt, then remove the rear pillar trim (A).
11. Installation is the reverse of removal.
NOTE
- Replace any damage clips.
- Make sure the connector is connected properly.
Luggage Side Trim Replacement
CAUTION
- Put on gloves to protect уоur hands.
- Use a plastic panel removal tool to remove interior trip pieces to without marring the surface.
- Take care not to bend or scratch the trim and panels.
1. Remove the rear seat.
(Refer to the BD group - "Rear Seat")
2. Remove the transverse trim.
3. Remove the rear door scuff trim.
4. After loosening the mounting screws, then remove the luggage side trim.
5. Installation is the reverse of removal.
NOTE
- Replace any damage clips.
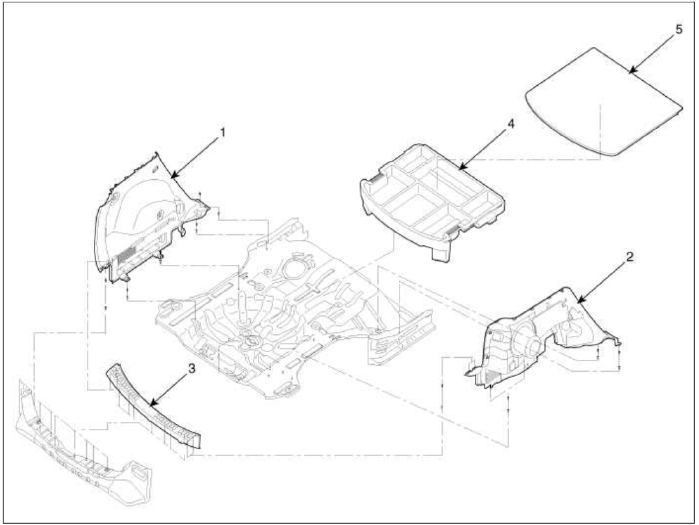
- Luggage side trim [LH]
- Luggage side trim [RH]
- Rear transverse trim
- Luggage center tray
- Luggage covering board
READ NEXT:
 Windshield Glass
Components and Components Location
Components
Windshield side
molding
Windshield glass
Repair procedures
Replacement
Removal
CAUTION
Put on gloves to protect your hand
Front Bumper | Rear Bumper
Components and Components Location
Components
Front bumper cover
Front bumper side bracket [LH]
Front bumper side bracket [RH]
Repair procedures
Replacement
CAUTI
SEE MORE:
Warning lights
The warning light and indicator light
indicate a situation where the driver
should be careful and whether the various
functions are activated.
Warning lights
The warning light indicates situations
that require the driver to pay attention
NOTICE
Warning lights
Make sure that all warning lig
Daytime Running Light (DRL)
The Daytime Running Light (DRL) can
make it easier for others to see the front
of your vehicle during the day.
The DRL can be helpful in many different
driving conditions, and it is especially
helpful after dawn and before sunset.
The DRL will turn the dedicated lamp
OFF when:
The hea
Content
- Home
- Kia Sportage - Fifth generation (NQ5) - (2022-2026) - Owner's Manual
- Kia Sportage - Second generation (JEKM) (2005-2015) - Body Workshop Manual
- Kia Sportage Third generation (SL) - (2011-2016) - Service and Repair Manual
- Sitemap
- Top articles
