Kia Sportage: LCD display
The LCD display modes can be changed with the control buttons.
LCD Display Control 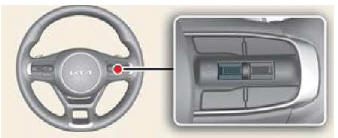
 MODE button for changing
modes
MODE button for changing
modes MOVE switch for
changing
items
MOVE switch for
changing
items- OK: SELECT/RESET button for setting or resetting the selected item
LCD display modes
The LCD display provides 5 modes. You can switch modes by pressing the Mode button.
Type A
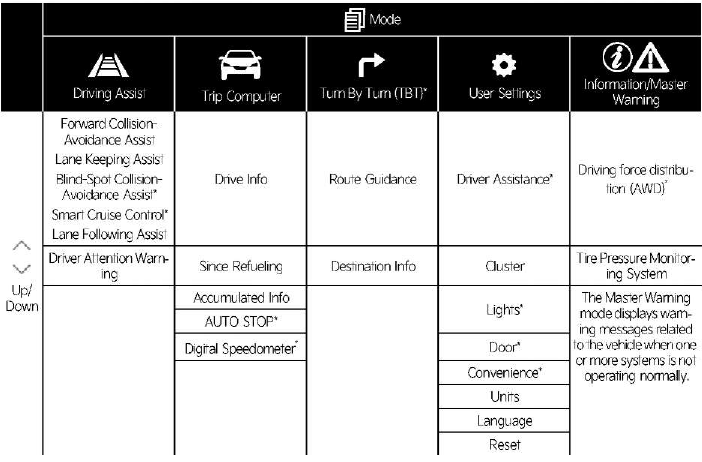
The information provided may differ depending on which functions are applicable to your vehicle.
* : if equipped
NOTICE
Keep the engine running when configuring the display settings to prevent the battery from discharging.
Type B
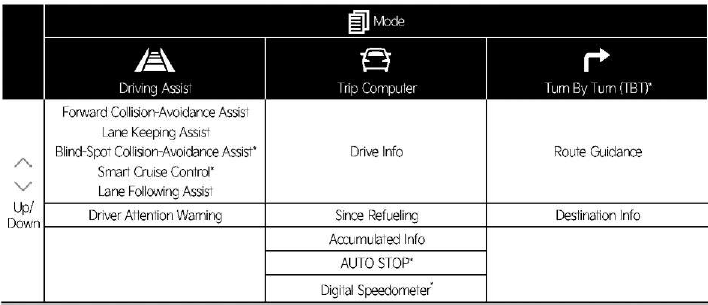
The information provided may differ depending on which functions are applicable to your vehicle.
* : if equipped
NOTICE
Keep the engine running when configuring the display settings to prevent the battery from discharging.
READ NEXT:
 Trip information (trip computer)
Drive info
Accumulated trip distance
Average fuel efficiency
Total driving time
The trip computer mode displays information
related to vehicle driving parameters
including fuel e
Vehicle settings (infotainment system) (if equipped)
Press the Settings button on the head
unit of the infotainment system.
Select Vehicle and change the setting
of the features.
Vehicle Settings in the infotainment system
provides user
SEE MORE:
Intake Actuator
Components and Components
Location
Component Location
Description and Operation
Description
1. The intake actuator is located at the blower unit.
2. It regulates the intake door by signal from control unit.
3. Pressing the intake selection switch will shift between recirculation a
Declaration of conformity
The radio frequency components
(Front Radar) complies:
For United States and United States territories
For Canada
The radio frequency components
(Rear Corner Radar) complies:
For United States and United States territories
For Canada
Radio frequency radiation exposure
Content
- Home
- Kia Sportage - Fifth generation (NQ5) - (2022-2026) - Owner's Manual
- Kia Sportage - Second generation (JEKM) (2005-2015) - Body Workshop Manual
- Kia Sportage Third generation (SL) - (2011-2016) - Service and Repair Manual
- Sitemap
- Top articles
