Kia Sportage: Opening the hood
Kia Sportage - Fifth generation (NQ5) - (2022-2026) - Owner's Manual / Features of your vehicle / Hood / Opening the hood
The hood serves as a cover for the engine compartment.
Open the hood if maintenance work needs to be performed in the engine compartment or if you need to look at the compartment.
Opening the hood
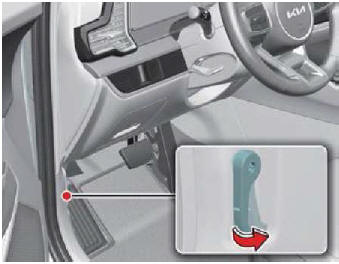
- Pull the release lever to unlatch the hood. The hood should pop open slightly.
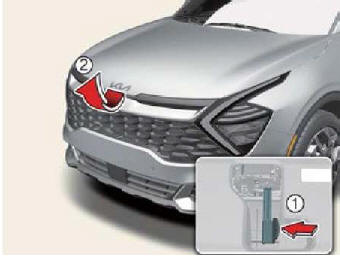
- Go to the front of the vehicle, raise the hood slightly, push the secondary latch (1) to the left and lift the hood (2).
- Pull out the support rod.
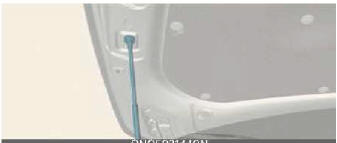
- Hold the hood opened with the support rod.
WARNING
Support rod
- After driving, the engine compartment
and support rod will be hot.
Grasp the support rod in the area wrapped in rubber to prevent burns.
- The support rod must be inserted completely into the hole provided whenever you inspect the engine compartment. This will prevent the hood f r om falling and possibly injuring you.
READ NEXT:
 Hood open warning
The hood warning message will appear
on the LCD display when hood is open.
The warning chime will operate when
the vehicle is being driven at or above 2
mph (3 km/h) with the hood open.
Closi
Opening the fuel filler door
Fuel filler door
The vehicle's fuel filler door must be
opened and closed by hand from outside
the vehicle.
Opening the fuel filler door
To unlock fuel filler door:
Press the unlock butto
SEE MORE:
Spot welding
1. Commercial spot welding machines do not perform
as well as the machines used in the manufacturing
process. When spot welding, increase the number
of spot welds by 30% (1.3 times the original number
of welds).
2. When spot welding, weld in the middle of the joint.
Spot welding on the
Start/Stop Button | Fob Holder
Components and Components Location
Component
Connector (10 pins)
Start stop button switch 1
LED illumination power
Amber LED
Start stop button illumination GND
Start stop button illumination Power
Ground
Start stop button switch 2
Green LED
R
Content
- Home
- Kia Sportage - Fifth generation (NQ5) - (2022-2026) - Owner's Manual
- Kia Sportage - Second generation (JEKM) (2005-2015) - Body Workshop Manual
- Kia Sportage Third generation (SL) - (2011-2016) - Service and Repair Manual
- Sitemap
- Top articles
