Kia Sportage: Seat Heater
Components and Components Location
Component Location
[Driver Seat / Assist Seat]
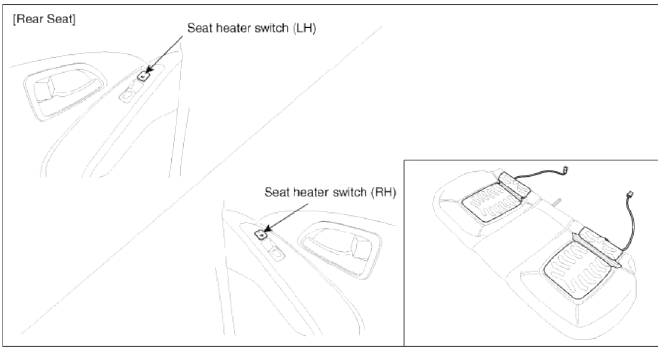
![[Rear Seat]](images/books/1921/29/index%205.png)
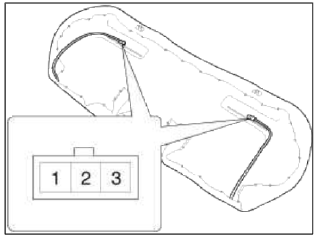
[Rear Seat]
Repair procedures
Removal
1. Remove the seat back cover and cushion cover.
(Refer to the BD group - "Front seat")
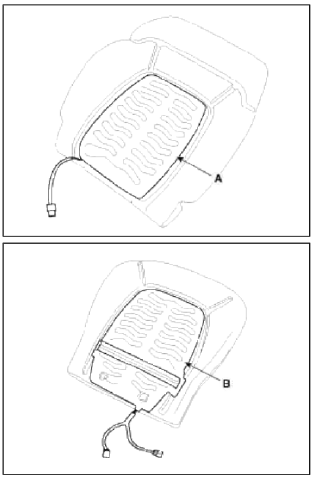
2. Remove the driver / assist seat back heater (A) and cushion heater (B).
3. Remove the cushion cover of rear seat.
(Refer to the BD group - "Rear seat")
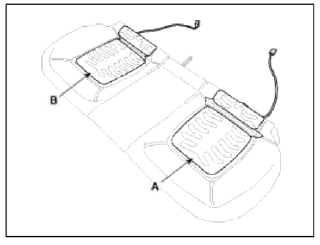
4. Remove the heater (A) of rear seat (LH) and the heater (B) of rear seat (RH).
Installation
1. Install the driver / assist seat back and cushion heater.
(Refer to the BD group - "Front seat")
2. Install the heater of rear seat (LH & RH).
(Refer to the BD group - "Rear seat")
Inspection
Driver / Assist Seat
1. Check for continuity and measure the resistance between terminals as below.
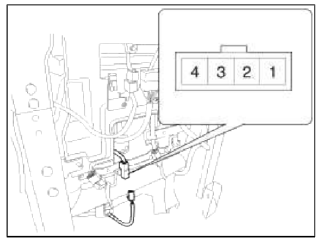
- Indicator
- Ground
- Low
- High
Standard value
Cushion : 1.39Ω +- 10% (leather/fabric)
Back : 1.41Ω +- 10% (leather/fabric)
Set : 2.8Ω +- 10% (leather/fabric)
2. Operate seat warmer after connecting the 4P connector, and then check the thermostat by measuring the temperature of seat surface.
Standard value
Cushion : 104 +- 3.6 ºF (40 +- 2 ºС) (LOW), 107.6 +- 3.6 ºF (42 +- 2 ºС) (HIGH)
Back : 114.8 +- 3.6 ºF (46 +- 2 ºС) (LOW), 125.6 +- 3.6 ºF (52 +- 2 ºС) (HIGH)
Rear Seat
1. Check for continuity and measure the resistance between terminal 2 and 3.
- Indicator
- Ground
- Heater
Standard value
Cushion : 5.29Ω +- 10% (leather/fabric)
2. Operate seat warmer after connecting the 4P connector, and then check the thermostat by measuring the temperature of seat surface.
Standard value
Cushion : 104 +- 3.6 ºF (40 +- 2 ºС)
READ NEXT:
 Climate Seat
Components and Components Location
Components
[Front Seat]
Ventilation blower
Ventilation ECU
Ventilation seat switch
Blower connector
Heater connector
Ventilation ECU
connec
Components and Components Location | Relay Box (Engine Compartment)
Component Location
[Engine Room Relay Box]
Main relay
Cooling fan relay (High)
Windshield deicer relay
Wiper relay (High)
Wiper relay (Low)
ATM relay
Rear
SEE MORE:
Components and ComponentsLocation | Repair procedures
Component location
Coupling
Sub frame
Assist arm
Lower arm
Upper arm
Trailing arm
Coil spring
Shock absorber
Stabilizer
Drive shaft
Differential carrier assembly
Components
Lock nut
Tone wheel
Ð’J as
Hazardous driving conditions
If driving conditions deteriorate due to
poor weather or road conditions, you
should pay even more attention than
usual to your driving.
Hazardous driving conditions
When hazardous driving conditions are
encountered such as water, snow, ice,
mud, sand, or similar hazards, follow
these sugges
Content
- Home
- Kia Sportage - Fifth generation (NQ5) - (2022-2026) - Owner's Manual
- Kia Sportage - Second generation (JEKM) (2005-2015) - Body Workshop Manual
- Kia Sportage Third generation (SL) - (2011-2016) - Service and Repair Manual
- Sitemap
- Top articles
