Kia Sportage: Front Wiper Motor
Components and Components Location
Component Location
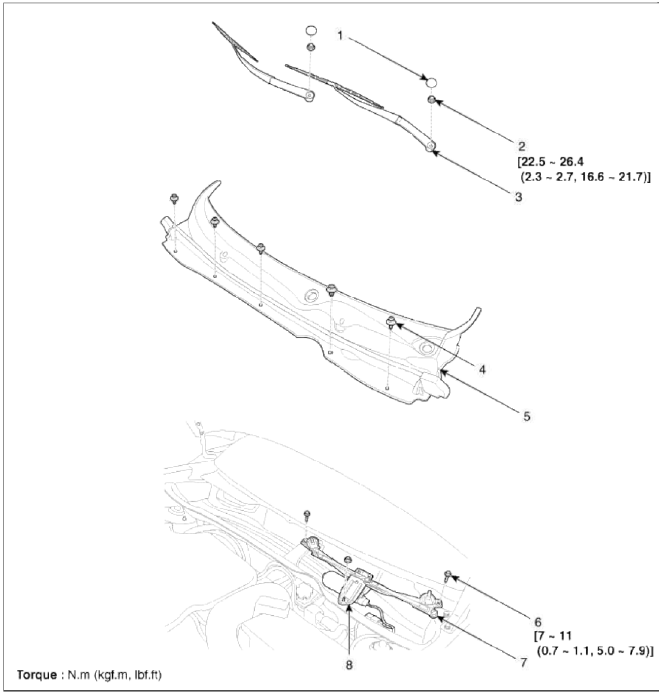
-
Cap
-
Nut
-
Wiper arm & blade
-
Clip
-
Cowl top cover
-
Bolt
-
Wiper motor & linkage assembly
-
Wiper motor connector
Repair procedures
Removal
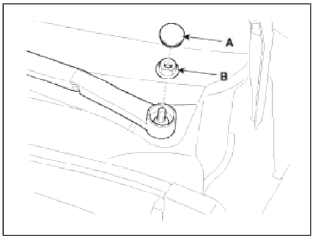
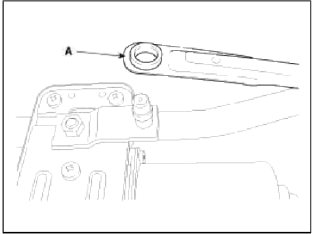
1. Remove the windshield wiper arm and blade after removing a nut (B) and wiper cap (A).
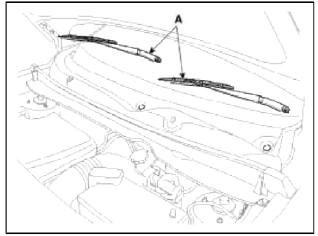
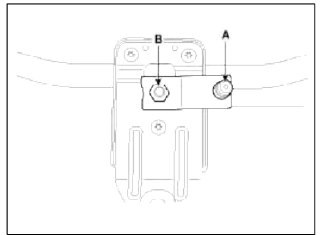
2. Remove the windshield wiper arm and blade (A).
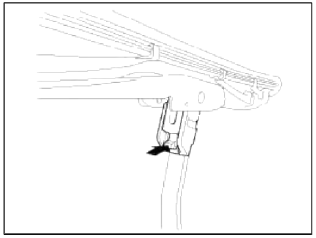
3. If necessary, release the wiper blade fixing clip by pulling up and remove the wiper blade from the inside radius of wiper arm.
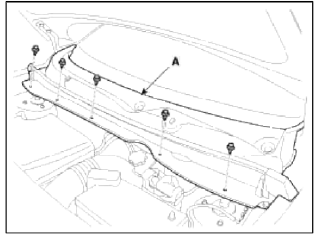
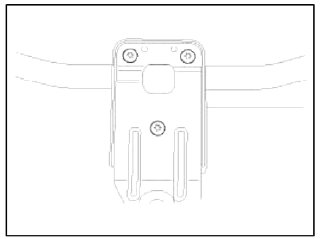
4. Remove the cowl top cover (A) after removing clips (5EA).
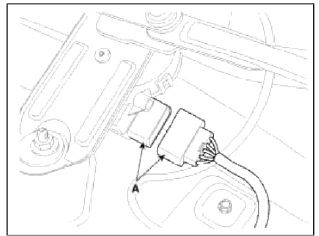
5. Disconnect the wiper motor connector (A) from the wiper motor & linkage assembly.
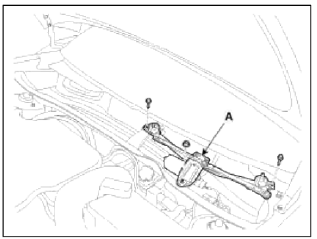
6. Remove the windshield wiper motor and linkage assembly (A) after removing 2 bolts and nut.
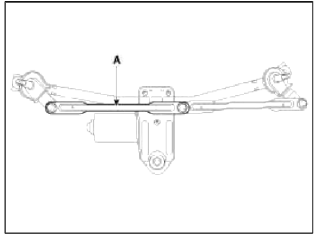
7. Hold the wiper motor crank arm and remove the upper linkage (A) from the wiper motor crank arm.
CAUTION
Before remove the wiper motor and linkage assembly, make sure that the linkage is stopped at automatic stop position.
To install the wiper motor crank arm exactly, check that the linkage is aligned with the crank arm in straight line and the angle of each linkages.
Put the matchmark on the wiper motor and linkage assembly.
Be careful not to bend the linkage.
8. Remove the lower linkage (A) from the wiper motor crank arm.
CAUTION
To install the wiper motor crank arm exactly, check that the linkage is aligned with the crank arm in straight line and the angle of each linkages.
Be careful not to bend the linkage.
9. Remove the crank arm (A) after loosening a nut (B).
10. Remove the wiper motor after loosening the 3 screws.
Installation
CAUTION
Do not allow the wiper arm to fall against the windshield, since it may chip or crack the windshield.
1. Install the wiper motor.
2. Install the crank arm.
Torque: 12.7 ~ 17.6 N.m (1.3~1.8 kgf.m, 9.4~13.0 lbf.ft)
CAUTION
To install the wiper motor crank arm, make sure that the linkage is aligned with the crank arm in straight line and set the angle of each linkages exactly using match mark.
3. Install the lower and upper linkage to the wiper motor crank arm.
CAUTION
To install the wiper motor crank arm, make sure that the linkage is aligned with the crank arm in straight line and set the angle of each linkages exactly.
Be careful not to bend the linkage.
4. Install the wiper motor and linkage assembly and then connect the wiper motor connector.
Torque: 7~11 N.m (0.7~1.1 kgf.m, 5.0~7.9 lbf.ft)
5. Install the cowl top cover.
6. Install the windshield wiper arm and blade.
Torque: 22.5~26.4 N.m (2.3~2.7 kgf.m, 16.6~21.7 lbf.ft)
NOTE
The windshield wiper motor must be cycled to make sure that it is in the park position.
If necessary, adjust the wiper arm and blade.
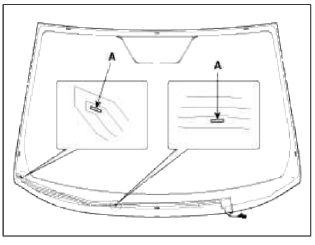
7. Install the wiper arm and blade to the specified position (A).
8. Set the cowl top cover on the specified spray position.
Inspection
Speed Operation Check
1. Remove the connector (A) from the wiper motor.
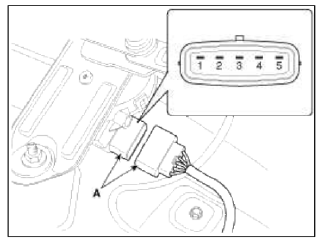
- Ground
- P (Parking)
- Battery (+)
- Low
- High
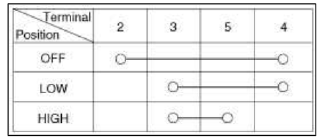
2. Attach the positive (+) lead from the battery to terminal 3 and the negative (-) lead to terminal 1.
3. Check that the motor operates at low or high speed as below table.
CAUTION
Common sources of contamination are insects, tree sap, and hot wax treatments used by some commercial car washes. If the blades are not wiping properly, clean both the window and the blades with a good cleaner or mild detergent, and rinse thoroughly with clean water.
READ NEXT:
 Front Washer Motor
Repair procedures
Inspection
Front Washer Motor
1. With the washer motor connected to the reservoir tank, fill the reservoir
tank with washer fluid.
NOTE
Before filling the reservoir tank
Rain Sensor
Schematic Diagrams
Circuit Diagram
Description and Operation
Description
The Rain sensing windshield wiper system is a wiper system that, in addition
to providing normal wiper func
SEE MORE:
Starter Relay
Repair procedures
Inspection
1. Remove the fuse box cover.
2. Remove the starter relay (A).
3. Using an ohmmeter, check that there is continuity between each terminal.
4. Apply 12V to terminal 85 and ground to terminal 86.
Check for continuity between terminals 30 and 87.
5. If ther
Climate control air filter
Filter inspection
The climate control air filter should be
replaced according to the maintenance
schedule. If the vehicle is operated in
severely air-polluted cities or on dusty
rough roads for a long period, it should
be inspected more frequently and
replaced earlier. When you replace the
c
Content
- Home
- Kia Sportage - Fifth generation (NQ5) - (2022-2026) - Owner's Manual
- Kia Sportage - Second generation (JEKM) (2005-2015) - Body Workshop Manual
- Kia Sportage Third generation (SL) - (2011-2016) - Service and Repair Manual
- Sitemap
- Top articles
