Kia Sportage: General Information
Kia Sportage Third generation (SL) - (2011-2016) - Service and Repair Manual / Driveshaft and axle / General Information
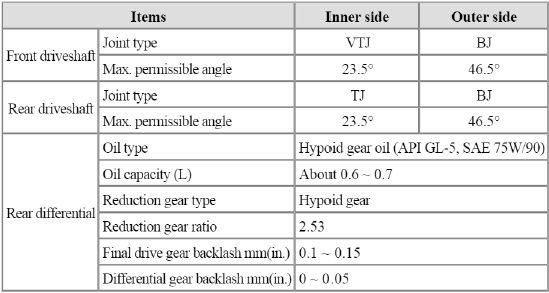
Specifications
Specification
Tightening torque
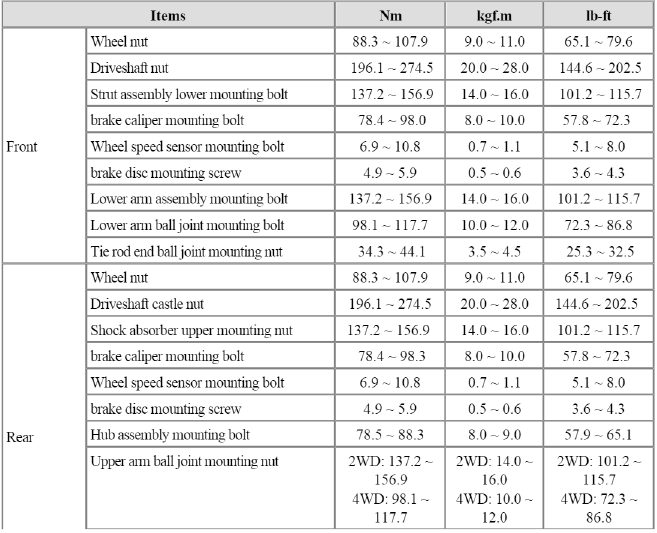

CAUTION
Replace self-locking nuts with new ones after removal brake.
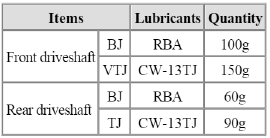
Lubricants
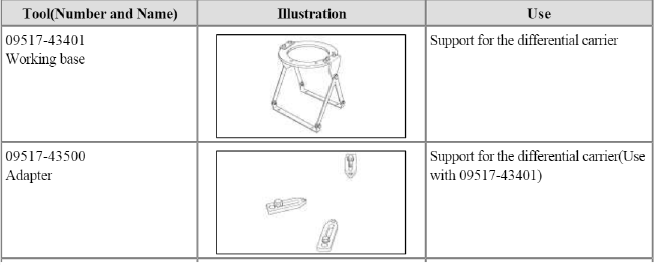
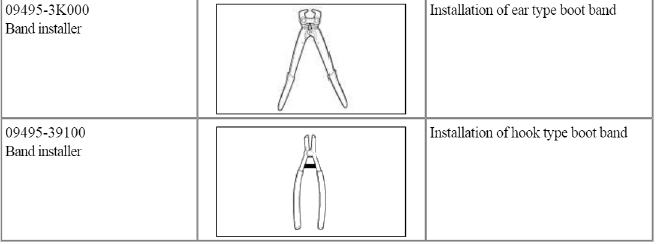
Special Service Tools
Special Service Tools
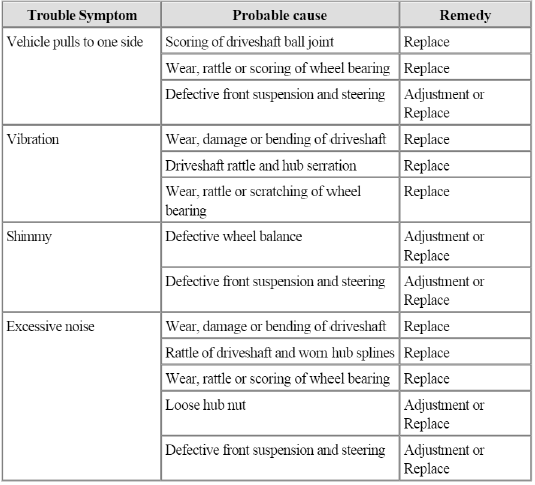
Troubleshooting
Troubleshooting
READ NEXT:
 Front Axle Assembly
Front Hub / Knuckle / Tone Wheel
Components and
Components Location
Components
Brake disc screw
Brake disc
Hub
Hub bolt
Dust cover
Knuckle
Wheel bearing
Snap ring
Repai
Components and ComponentsLocation | Repair procedures
Components
Front driveshaft (LH)
Inner shaft
Front driveshaft (RH)
[LH]
Split pin
Castle nut
Washer
BJ assembly
Clip A
Ð’J boot ban
SEE MORE:
Side Airbag (SAB) Module | Curtain Airbag (CAB) Module
Description and Operation
Description
The Side Airbags (SAB) are installed inside the front seat and protects the driver and passenger from danger when side crash occurs. The SRSCM determines deployment of side airbag by using Side Impact Sensor (SIS) signal.
CAUTION
Never attempt to mea
Important safety precautions
Safety features of your
vehicle
For the safety of the driver and vehicle
passengers, you should become familiar
with the vehicle's safety features.
Important safety precautions
You will find many safety precautions
and recommendations throughout this
section, and throughout this manual.
Content
- Home
- Kia Sportage - Fifth generation (NQ5) - (2022-2026) - Owner's Manual
- Kia Sportage - Second generation (JEKM) (2005-2015) - Body Workshop Manual
- Kia Sportage Third generation (SL) - (2011-2016) - Service and Repair Manual
- Sitemap
- Top articles
