Kia Sportage: Interior Lamp Control
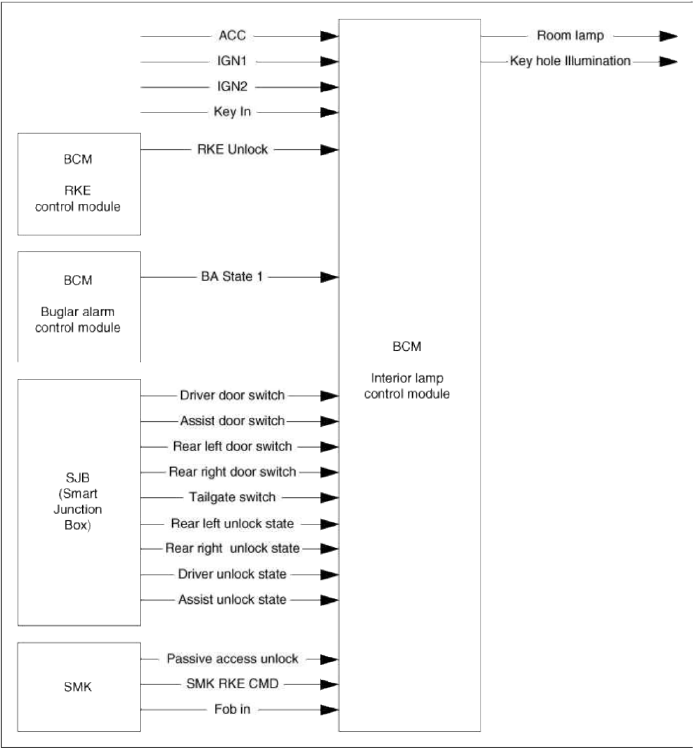
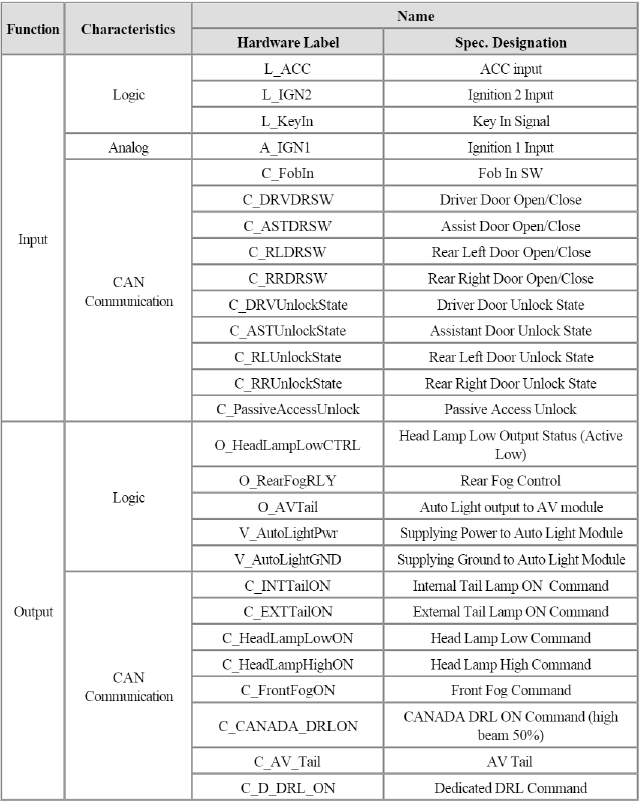
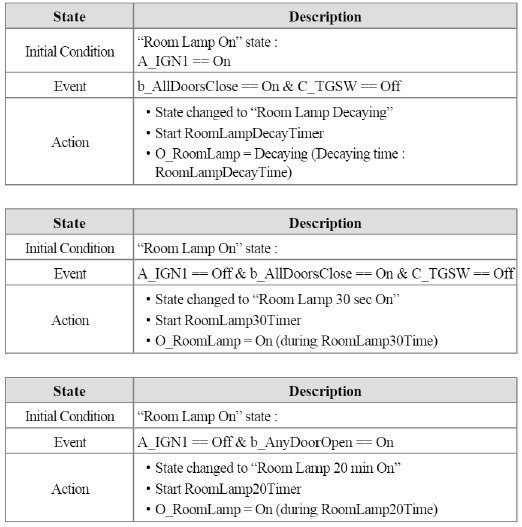
Room Lamp Control
1. Transitions from "Room Lamp Off' state:
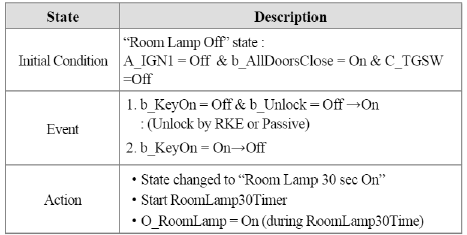
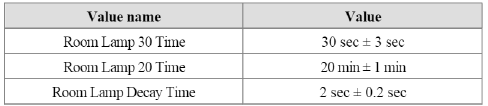
T1 : Room lamp 30 time, T2 : Room lamp 20 time

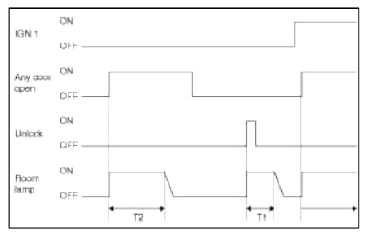
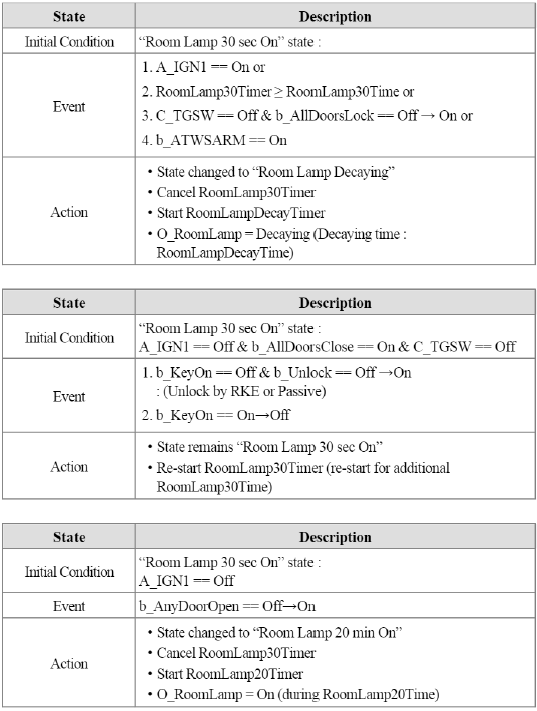
2. Transitions from "Room Lamp 30 sec On" state :
Т1 : Room lamp 30 time, T2 : Room lamp 20 time

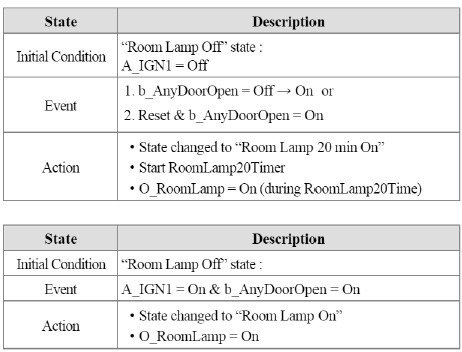
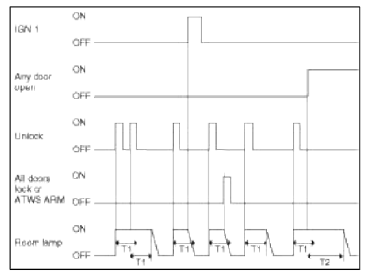
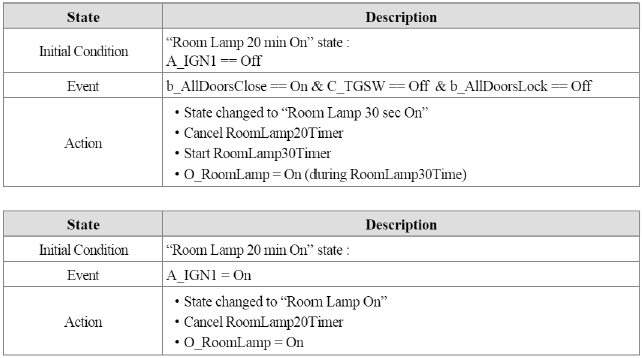
3. Transitions from ''Room Lamp 20 min On" state:

T1 : Room lamp 30 time, T2 : Room lamp 20 time

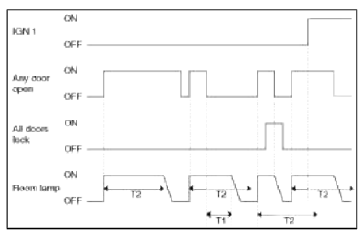
4. Transitions from "Room Lamp Decaying" state :
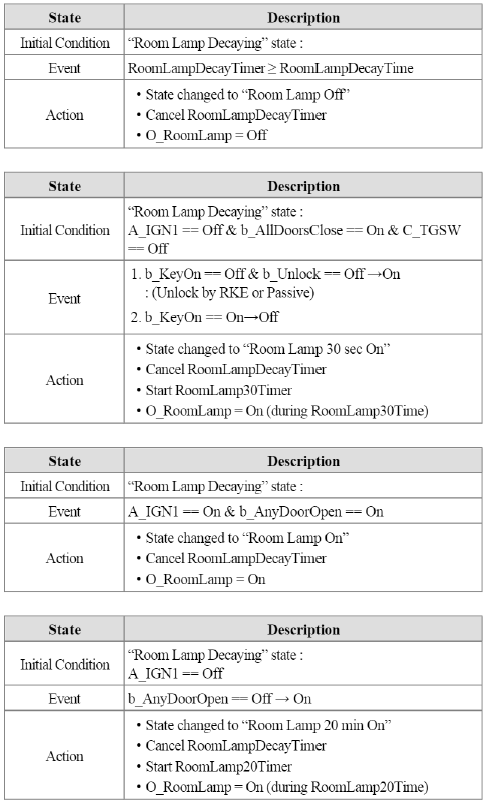
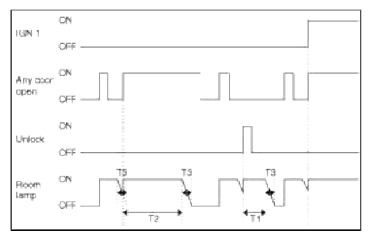
Т1 : Room lamp 30 time, T2 : Room lamp 20 time, T3 : Room lamp decay time
5. Transitions from "Room Lamp On" state:
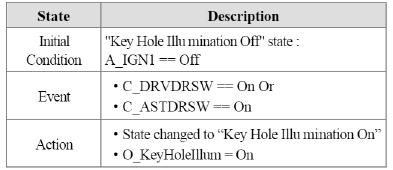
Key Hole Illumination Lamp Control
1. General Description
- Key hole illumination provides a convenient ring illumination around the area where the driver has to insert his ignition key to switch terminals.
- Key Hole illumination activated by drive or assistant door open, and after close it maintain illumination during 30 seconds.
2. Transition from "Key Hole Illumination Off"
3. Transition from "Key Hole Illumination On"
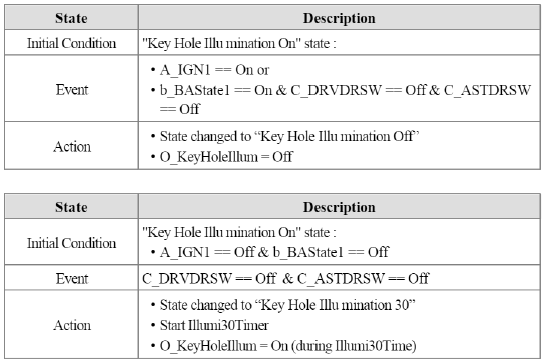
4. Transition from "Key Hole Illumination 30"

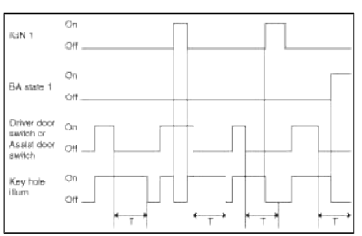
T1 : Illumi 30 time

READ NEXT:
 Warning Control
Warning Control
1. The Warning function offers the following features
Seat Belt Warning
Seat Belt Re minder
Over Speed Warning
Key Reminder Warning
Parking Brake Warning
RKE Key
Doors Lock/Unlock Control
Central Door Lock/Unlock Function
1. If the central locking/unlocking request is detected, central locking
function is operated and outputs all doors
lock/unlock during LockOutTime/UnlockO
Power Window Control | Key Interlock Solenoid Control
Power Window Timer Control
1. After IGN1 is On. Power Window can operate and after IGN1 Off it is possible to operate the Power window, for "PwdwTime"(30 sec +-3 sec).
2. During count
SEE MORE:
Crash Pad
Components and Components Location
Components
Main crash pad assembly
Crash pad side cover
[LH]
Crash pad side cover
[RH]
Cluster fascia panel
Reinforcing panel
Crash pad lower panel
Center fascia panel
Crash pad garnish
Glove box housing
Glove box
Cowl cross bar
Front Seat
Components and Components
Location
Components
Headrest
Headrest guide
Front seat back cover
Front seat back heater
Front seat back pad
Front seat back power lumbar
Front seat back duct
Front seat back frame
Front seat back cover
Front seat map pocket
Front inside co
Content
- Home
- Kia Sportage - Fifth generation (NQ5) - (2022-2026) - Owner's Manual
- Kia Sportage - Second generation (JEKM) (2005-2015) - Body Workshop Manual
- Kia Sportage Third generation (SL) - (2011-2016) - Service and Repair Manual
- Sitemap
- Top articles
