Kia Sportage: Speakers
Repair procedures
Inspection
1. Troubleshooting for Speaker
- Basic inspection of speaker
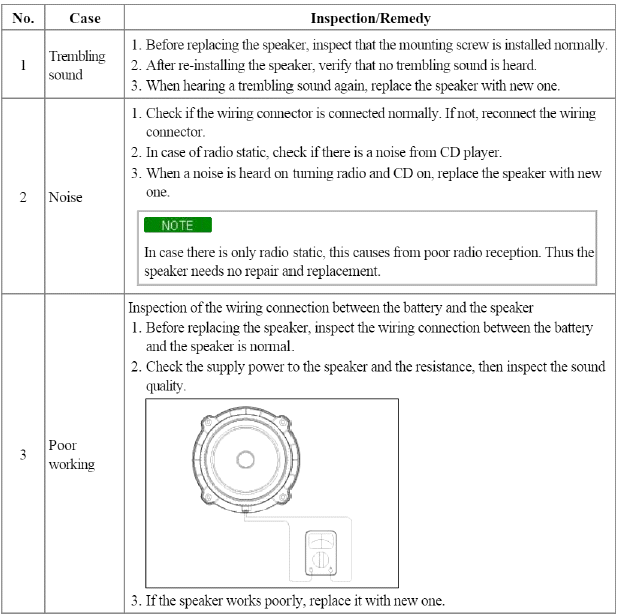
Inspect the sound from speaker after verifying that the speaker mounting screws are removed and the wiring connector is connected to remove any possible vibration transmitted from body trims and surrounding parts.
- Case Troubleshooting
CAUTION
When handling the speakers:
- Do not damage the speaker with impact, like chopping or throwing it.
- Be careful not to drop water and oil on the speakers.
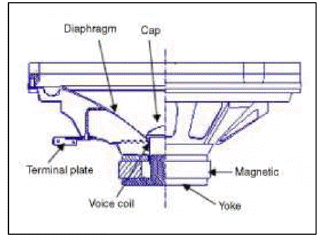
- Caution during handling of speaker because the material of diaphragm is paper which is easily torn by impact or external force.
- Modifying the audio system may cause damage the speakers. If this is the case, the speakers are not covered by the manufacturer's warranty.
Removal
Front Door Speaker
1. Remove the front door trim.
(Refer to the BD group - "Front door")
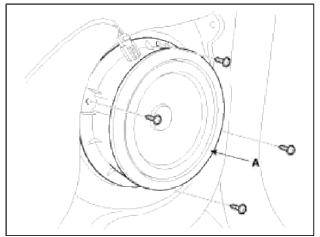
2. Remove the front speaker (A) after removing 4 rivets.
Rear Door Speaker
1. Remove the rear door trim.
(Refer to the BD group - "Rear door")
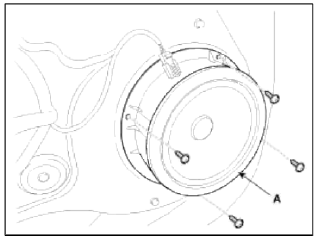
2. Remove the rear speaker (A) after removing 4 rivets.
Tweeter Speaker (Front)
1. Remove the front door delta cover (A).
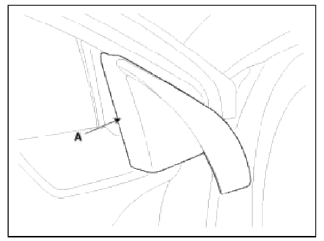
NOTE
Take care not to damage and scratch the delta cover and its related parts.
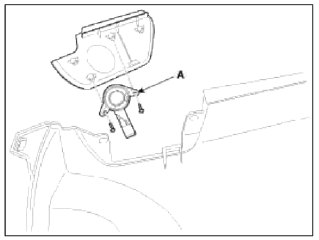
2. Remove the door trim.
(Refer to the BD group - "Front door")
3. Remove the tweeter speaker (A) after disconnecting the connector.
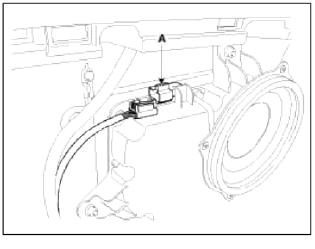
Woofer Speaker
1. Remove the right luggage side trim.
(Refer to the BD group - "Interior trim")
2. Remove the woofer speaker connector (A).
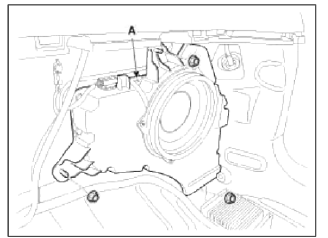
З. Remove the woofer speaker (A) after removing nuts (3EA).
External Amplifier
1. Remove the right luggage side trim.
(Refer to the BD group - "Interior trim")
2. Disconnect the external amplifier connectors (A).
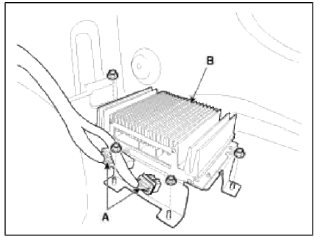
3. Remove the external amplifier (B) after loosening the mounting nuts (4EA).
Installation
Front Door Speaker
1. Install the speaker to the speaker mounting hole in the door in-panel.
2. Reconnect the speaker connector.
Rear Door Speaker
1. Install the speaker to the speaker mounting hole in the door in-panel.
2. Reconnect the speaker connector.
Tweeter Speaker (Front)
1. Install the front tweeter speaker to the front door delta cover.
2. Reconnect the connector and then install the delta cover.
Woofer Speaker
1. Install the woofer speaker to the right quarter inner panel.
2. Reconnect the connector.
3. Install the right luggage side trim.
External Amplifier
1. Reassemble the external amplifier after connecting the connector.
2. Install the right luggage side trim.
NOTE
- Make sure that the amplifier connectors are plugged in properly.
- Check the audio system.
READ NEXT:
 Antenna | Audio Remote Control
Repair procedures
Inspection
Antenna Cable
1. Remove the antenna jack from the audio unit and antenna.
2. Check for continuity between the center poles of antenna cable.
3. Check for cont
AUX (Auxiliary) Jack | Troubleshooting
Schematic Diagrams
Circuit Diagram
[AUX, USB, iPod Jack]
Description and Operation
Description
The AUX, iPod and USB JACK on the center console is for customers who like to listen
SEE MORE:
Driving at night/ Driving in the rain
Driving at night
Because night driving presents more
hazards than driving in the daylight,
here are some important tips to remember:
Slow down and keep more distance
between you and other vehicles, as it
may be more difficult to see at night,
especially in areas where there may
no
Rear Disc Brake
Components and Components Location
Components
Guide rod bolt
Bleed screw
Caliper bracket
Caliper body
Inner pad shim
Brake pad
Pad retainer
Repair procedures
Removal
1. Remove the rear wheel & tire.
Tightening torque:
88.3 ~ 107.9 N.m (9.0 ~ 11.0 kgf.m, 65.1 ~ 79.
Content
- Home
- Kia Sportage - Fifth generation (NQ5) - (2022-2026) - Owner's Manual
- Kia Sportage - Second generation (JEKM) (2005-2015) - Body Workshop Manual
- Kia Sportage Third generation (SL) - (2011-2016) - Service and Repair Manual
- Sitemap
- Top articles
